


Smart Outdoor Camera Instructions
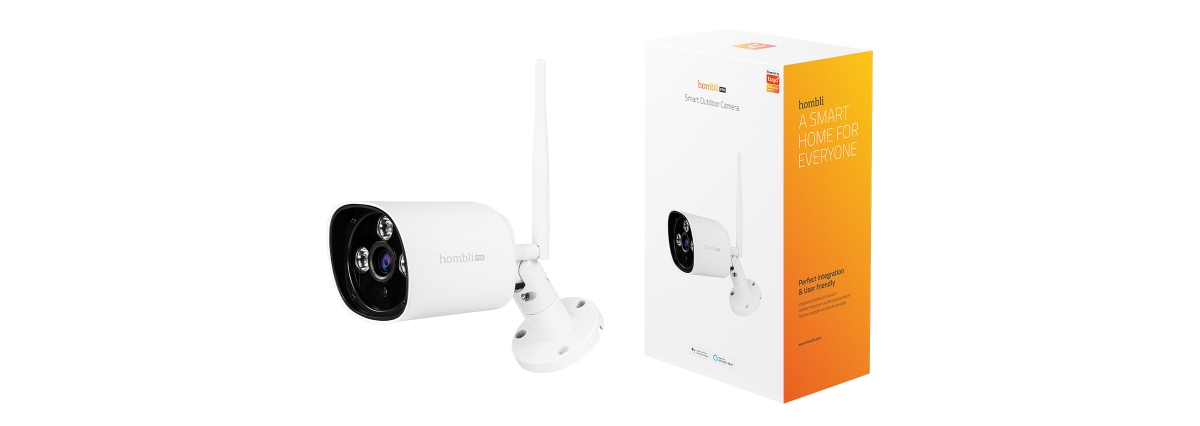
How to install the Hombli Smart Outdoor Camera
On this page we explain to you how you can install the Hombli Smart Outdoor Camera. Setting up the outdoor camera is easy. Scroll down for the step-by-step guides.

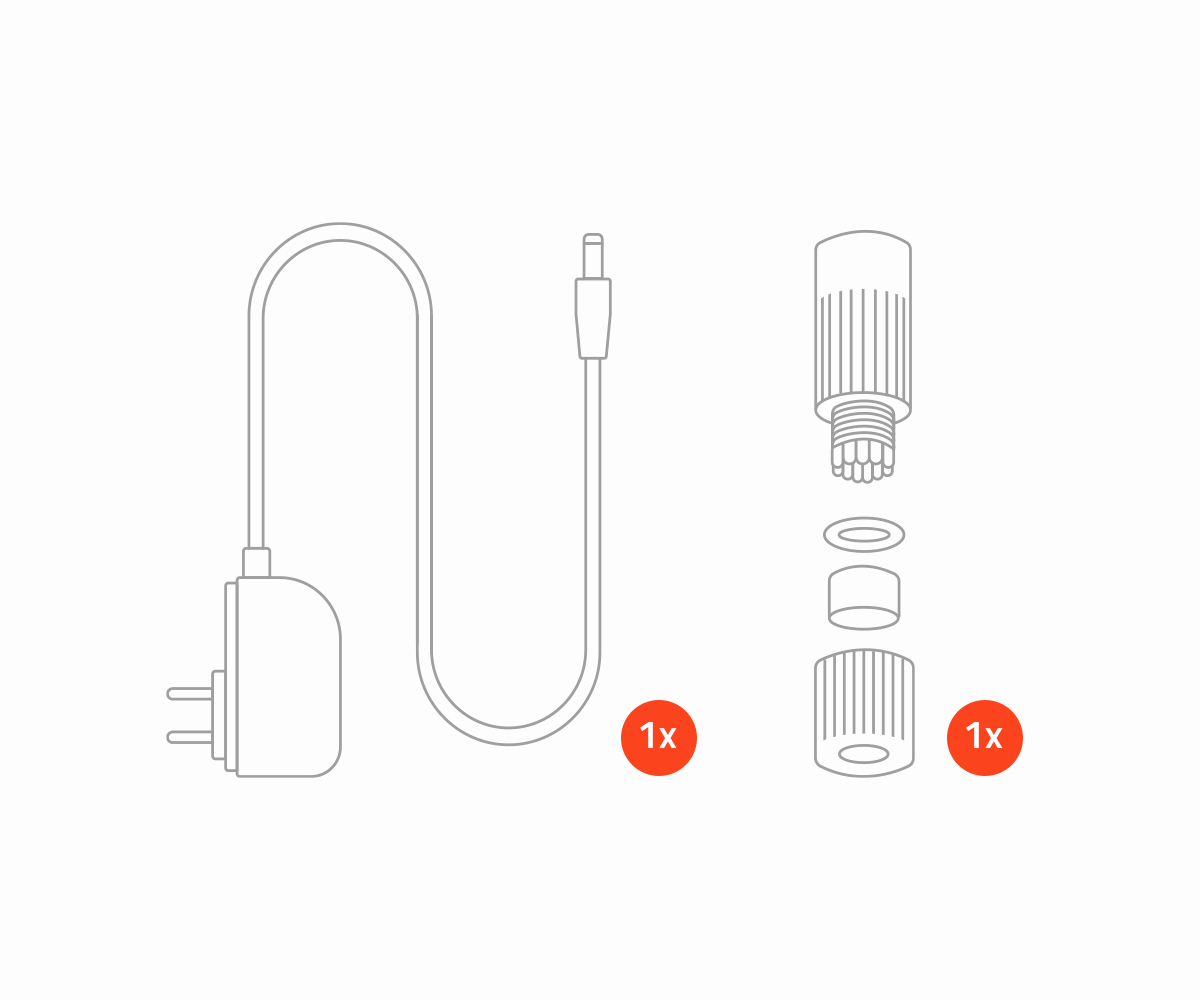
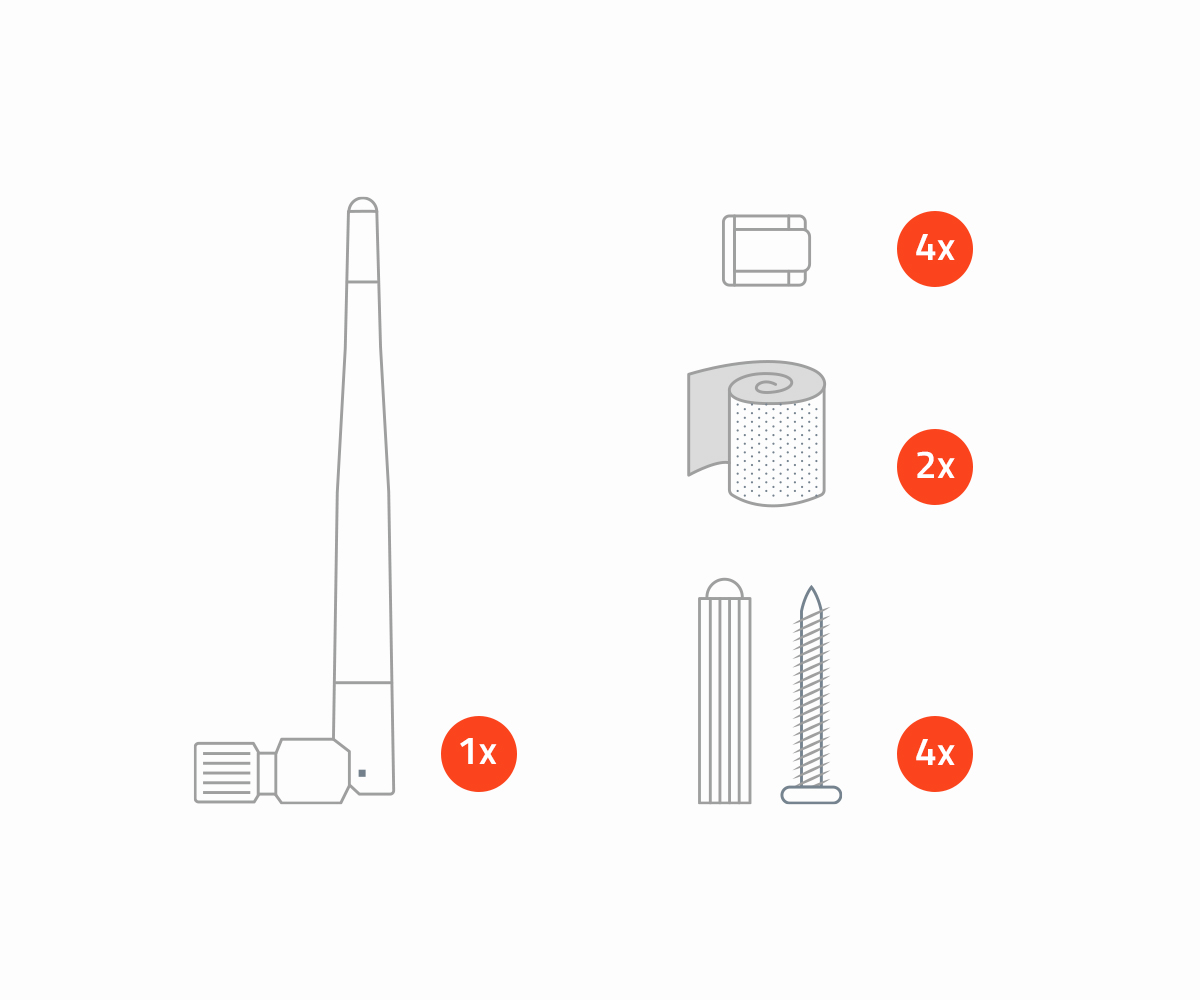
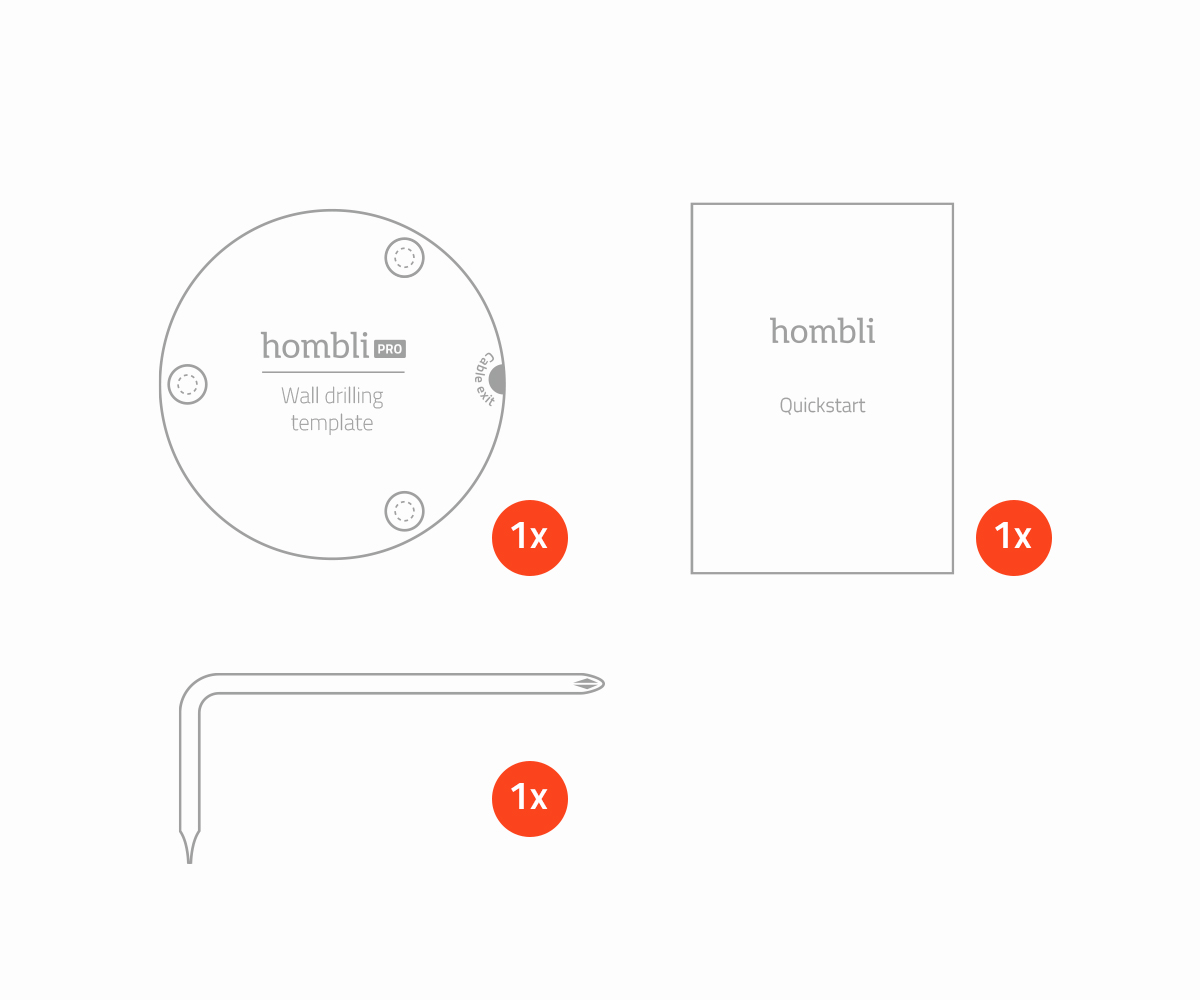
What's in the box?
- 1x Hombli Smart Outdoor Camera
- 1x Power adapter
- 1x Cable sealing kit
- 1x Antenna
- 4x Line buckle
- 4x Plug & screw
- 2x Waterproof tape
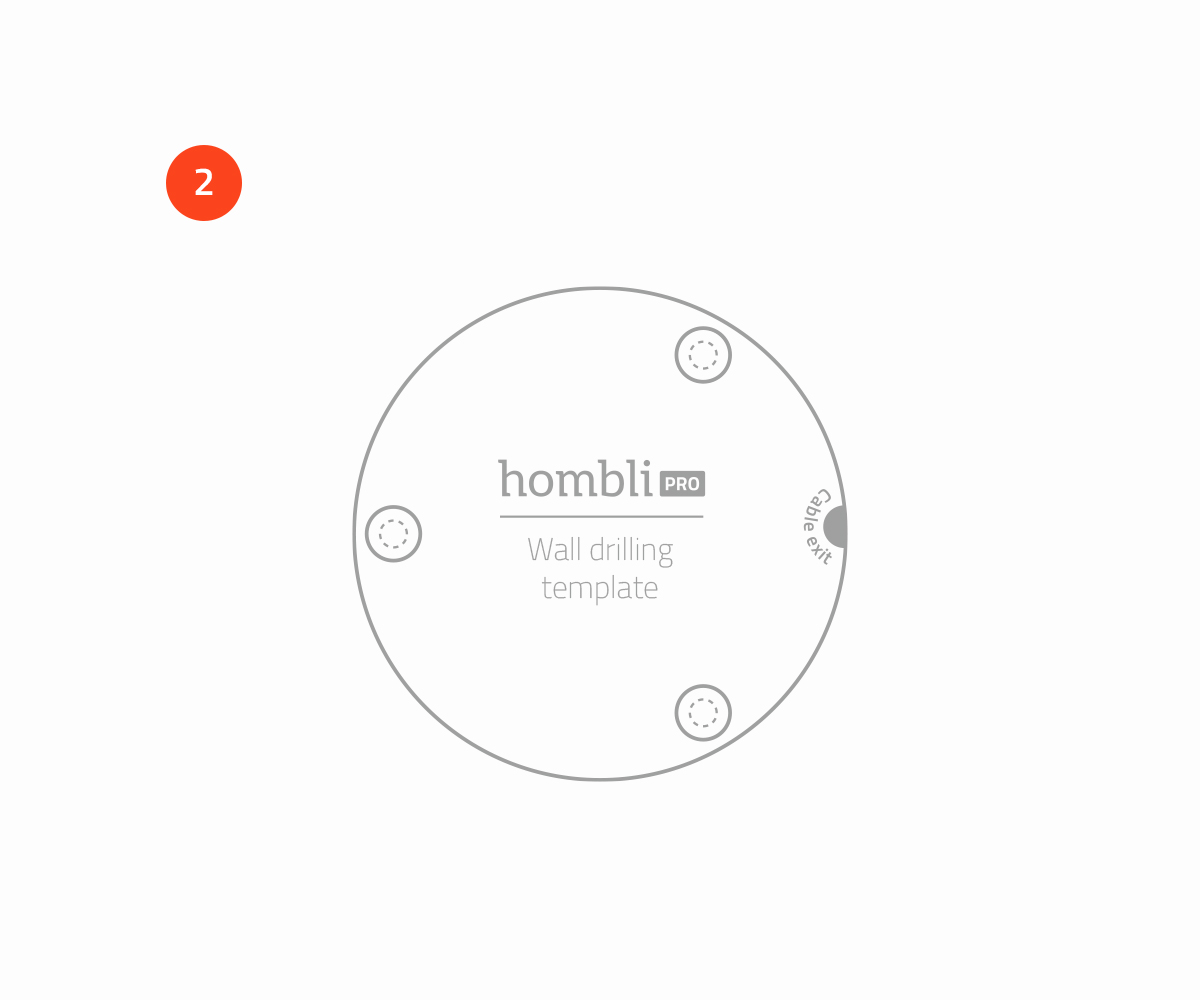
- 1x Wall drilling template
- 1x Quickstart guide
- 1x Screwdriver
Installation
Before installing, pair the camera and check the connection.
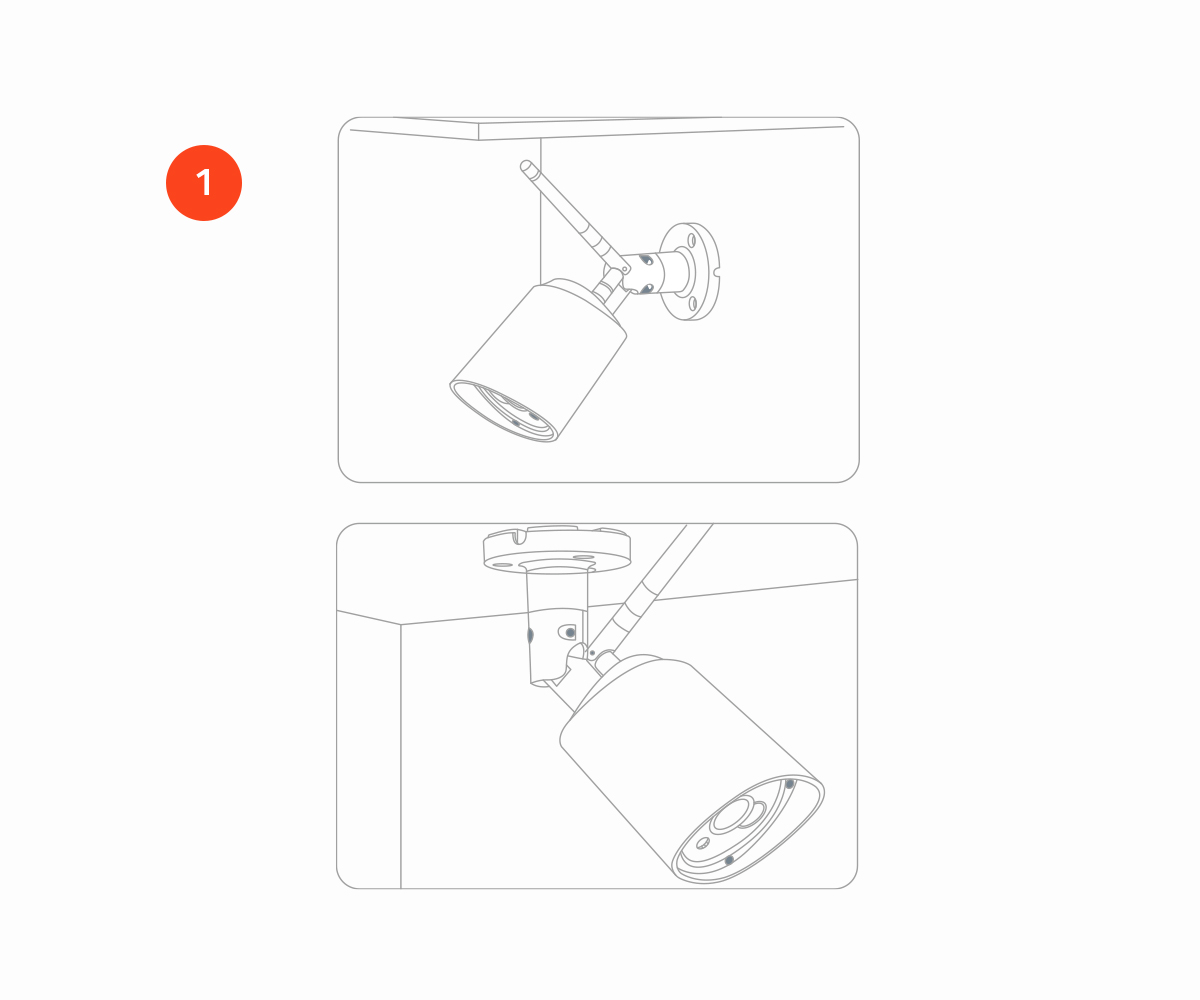
- Choose a spot to install the Hombli Smart Outdoor Camera (wall, ceiling etc.).
- Once you’ve chosen a spot, take the wall drilling template and stick it on the installation spot.
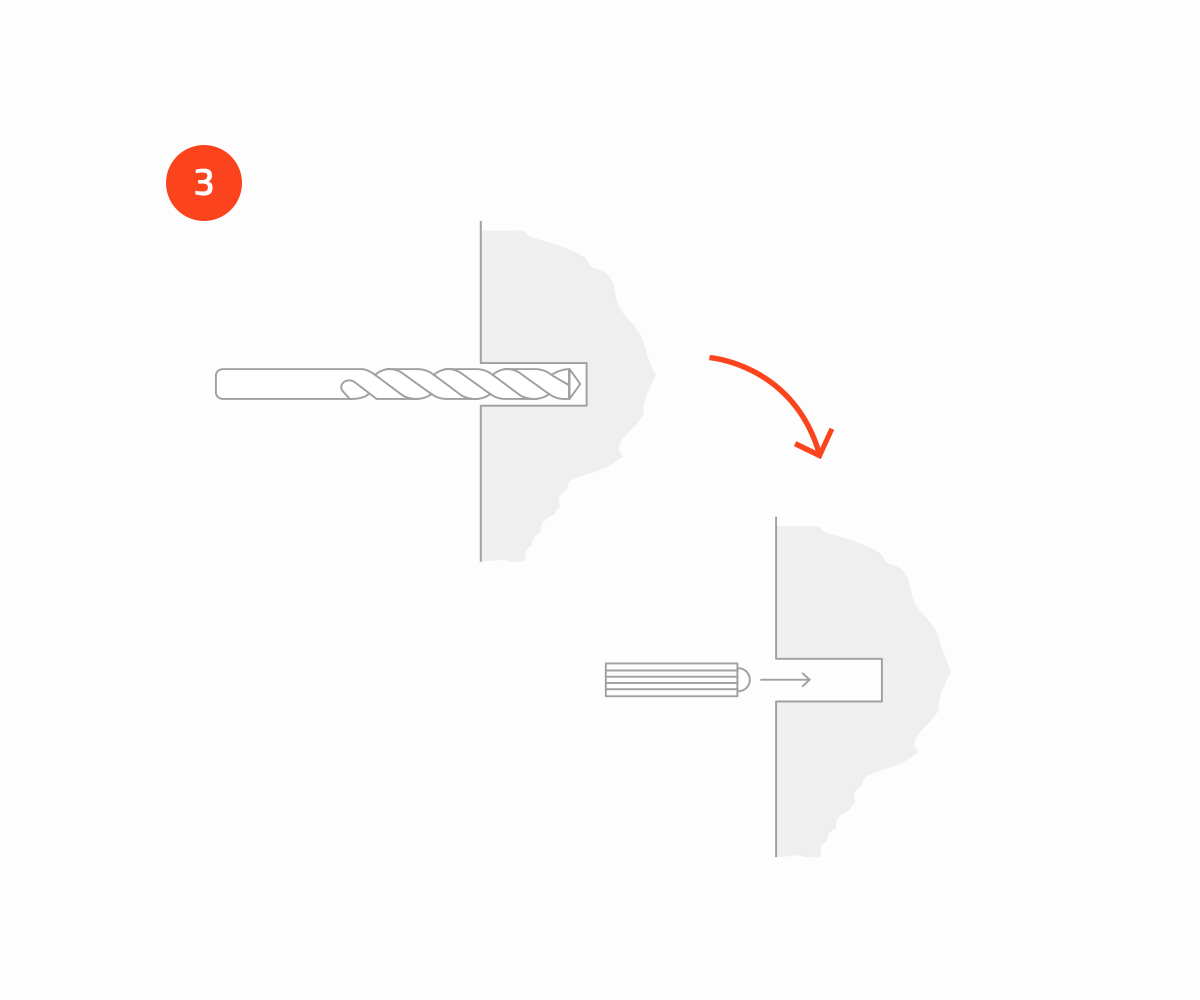
- Drill three holes (using a 6mm drill bit). Insert the provided plugs into the holes. Note: Skip this step when installing on a wooden surface.
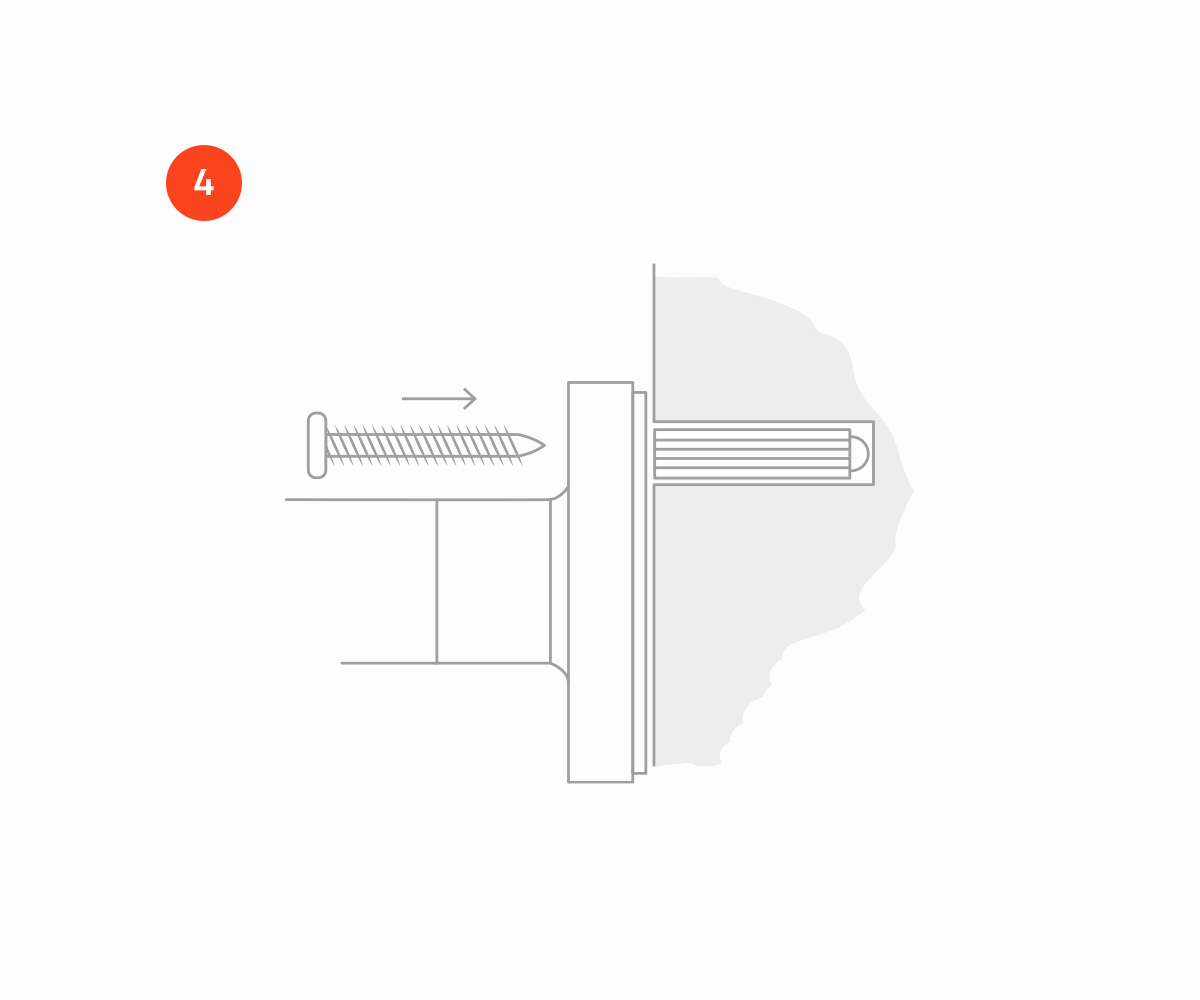
- Now use the three provided screws to secure the Hombli Outdoor Camera in its place.
Note: It’s also possible to feed the wires through the wall directly behind the camera. An additional hole is required for this option!
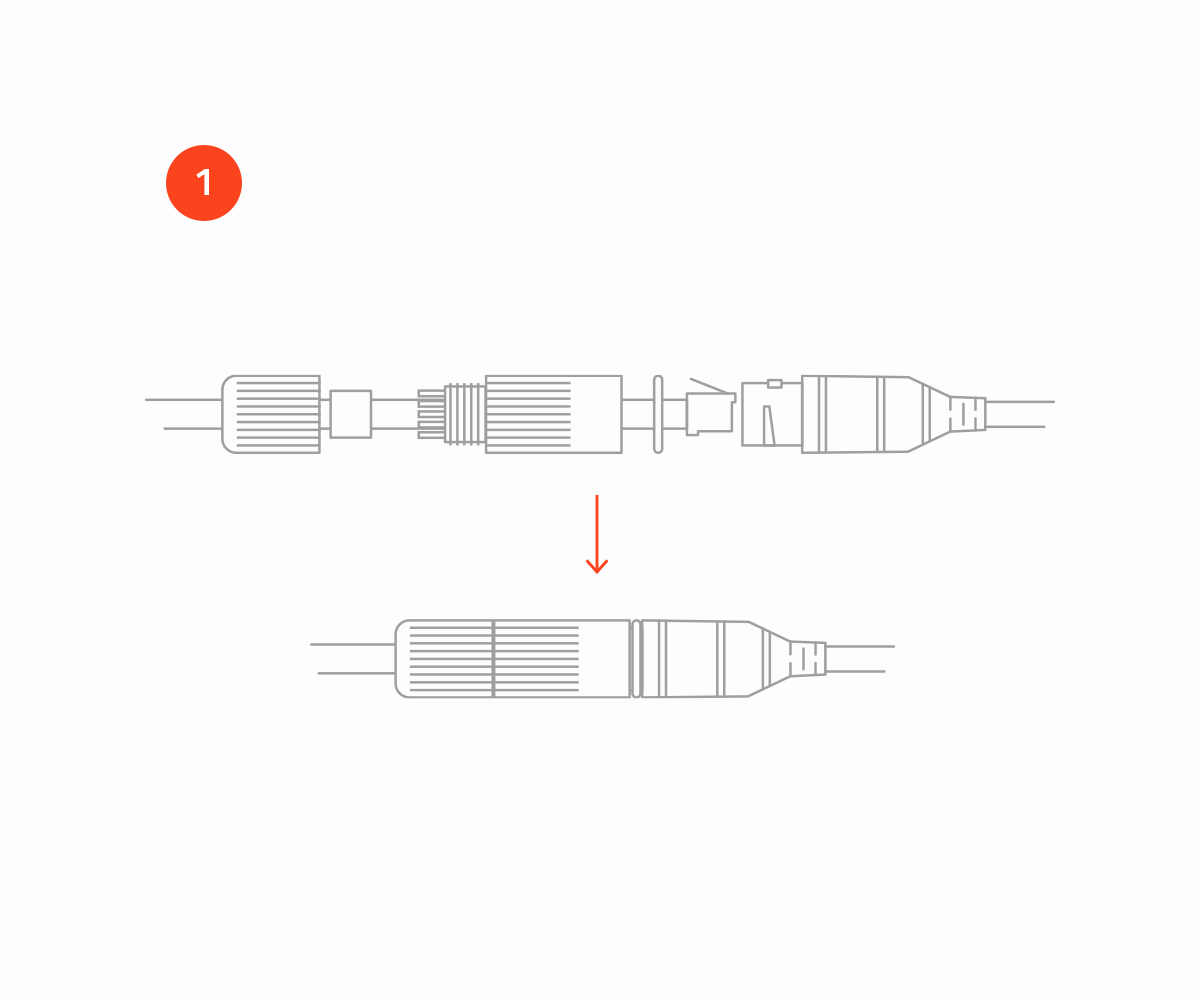
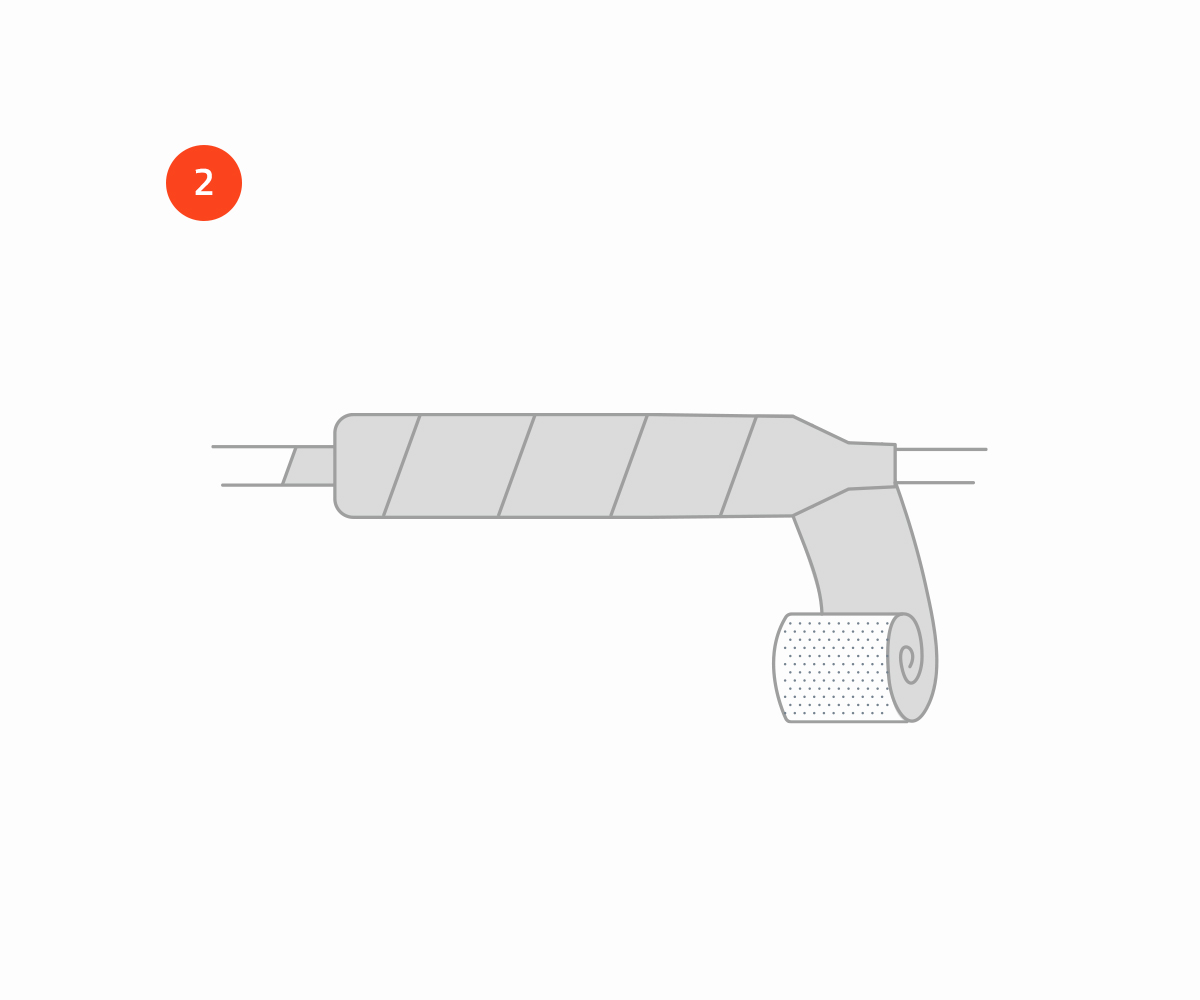
Waterproof guide
- Place the red O ring over the RJ45 Ethernet connector before tightening all the components.
- Use the provided waterproof tape to seal the connecting parts.
- Repeat this process also for the power connector.