


Smart Doorbell Instructions
How to Install the Hombli Smart Doorbell
On this page, we explain how you can easily install the Hombli Smart Doorbell on a wall or door. The doorbell can be installed with the included powerful double-sided tape or with the included wall plugs and screws. We explain both options with easy to follow instructions.
Optional: The Hombli Smart Doorbell is by default powered by the built-in rechargeable battery. If preferred it also possible to power the doorbell permanently with the included micro USB cable.
Scroll down for all the step-by-step installation guides.
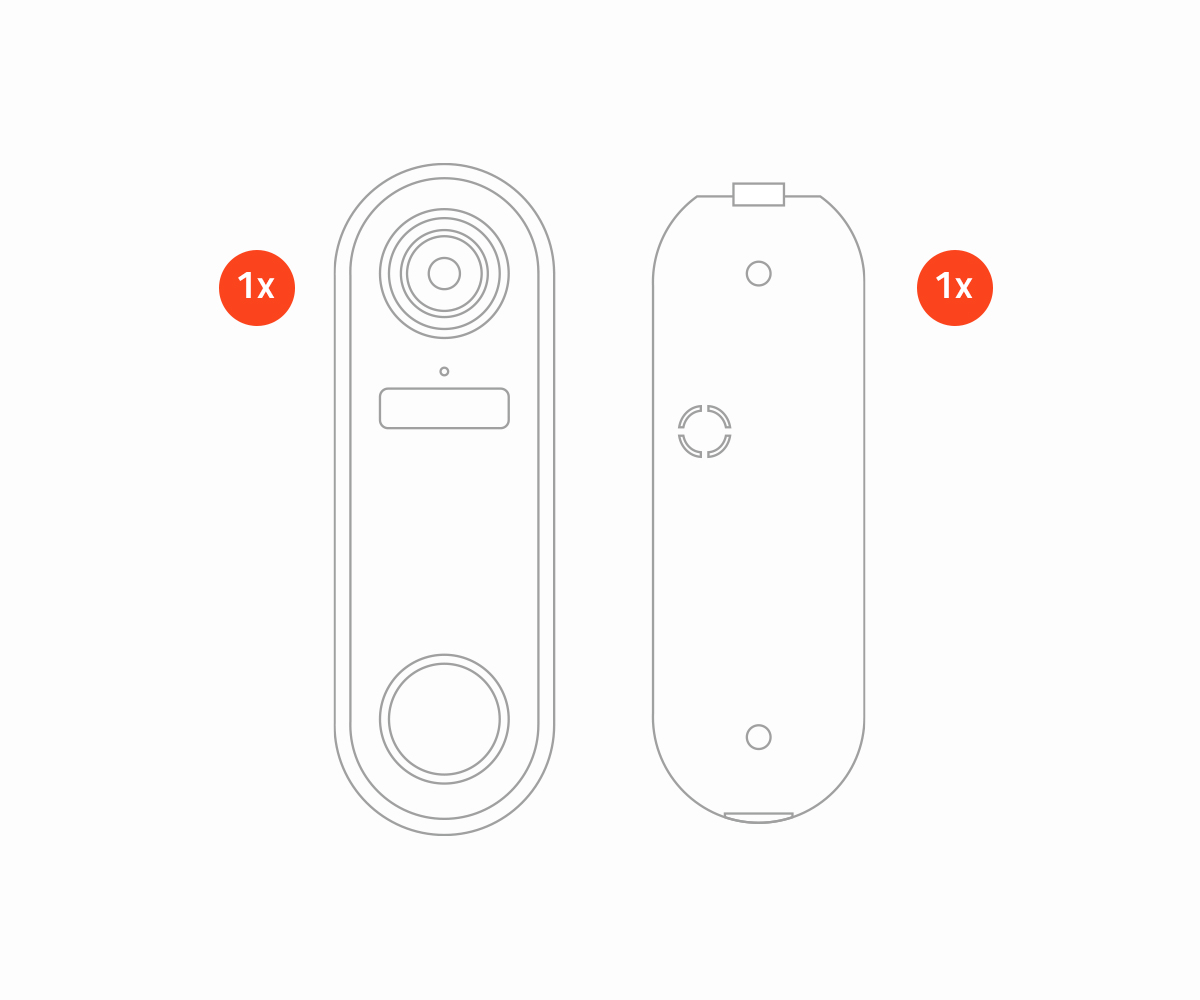
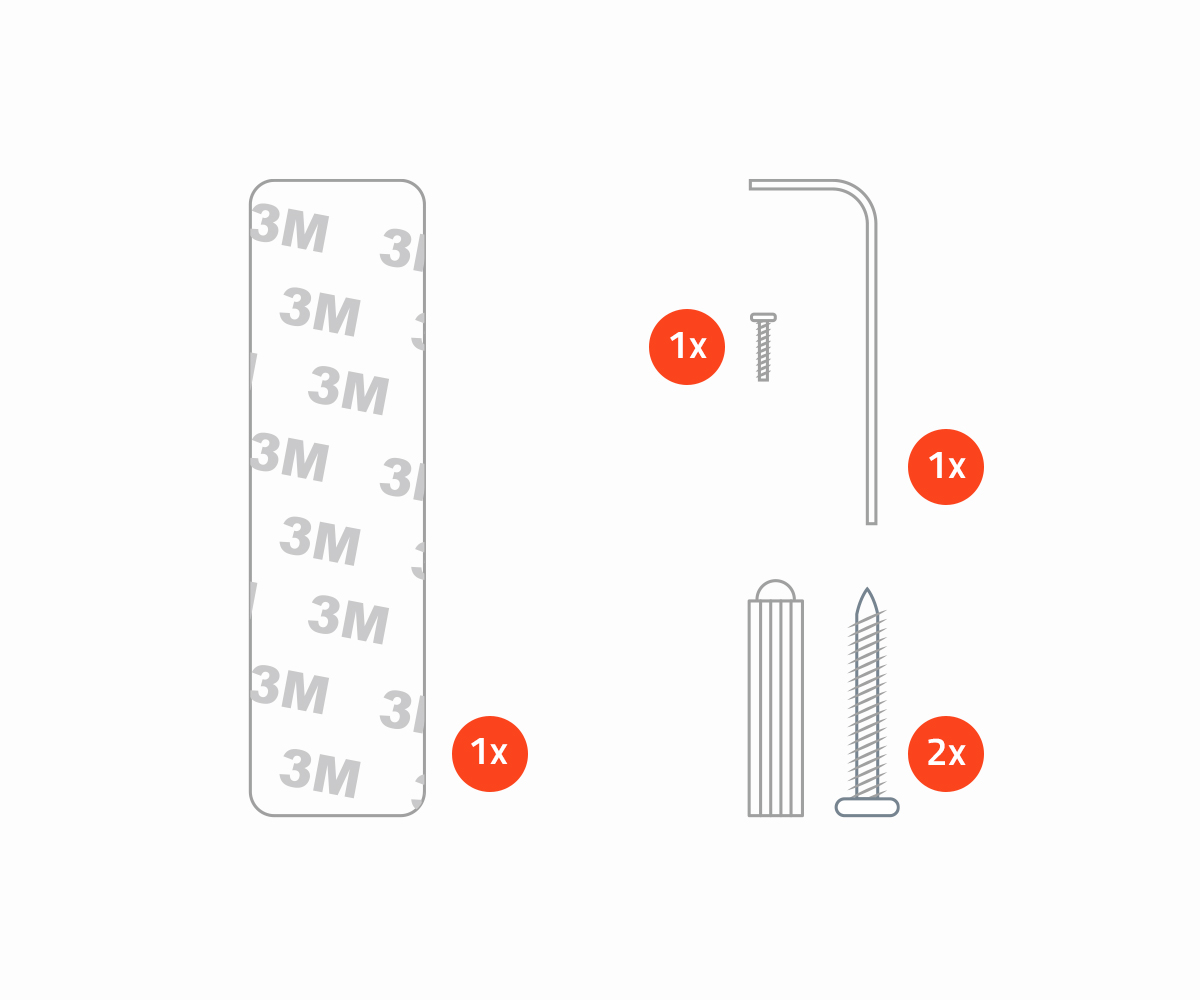
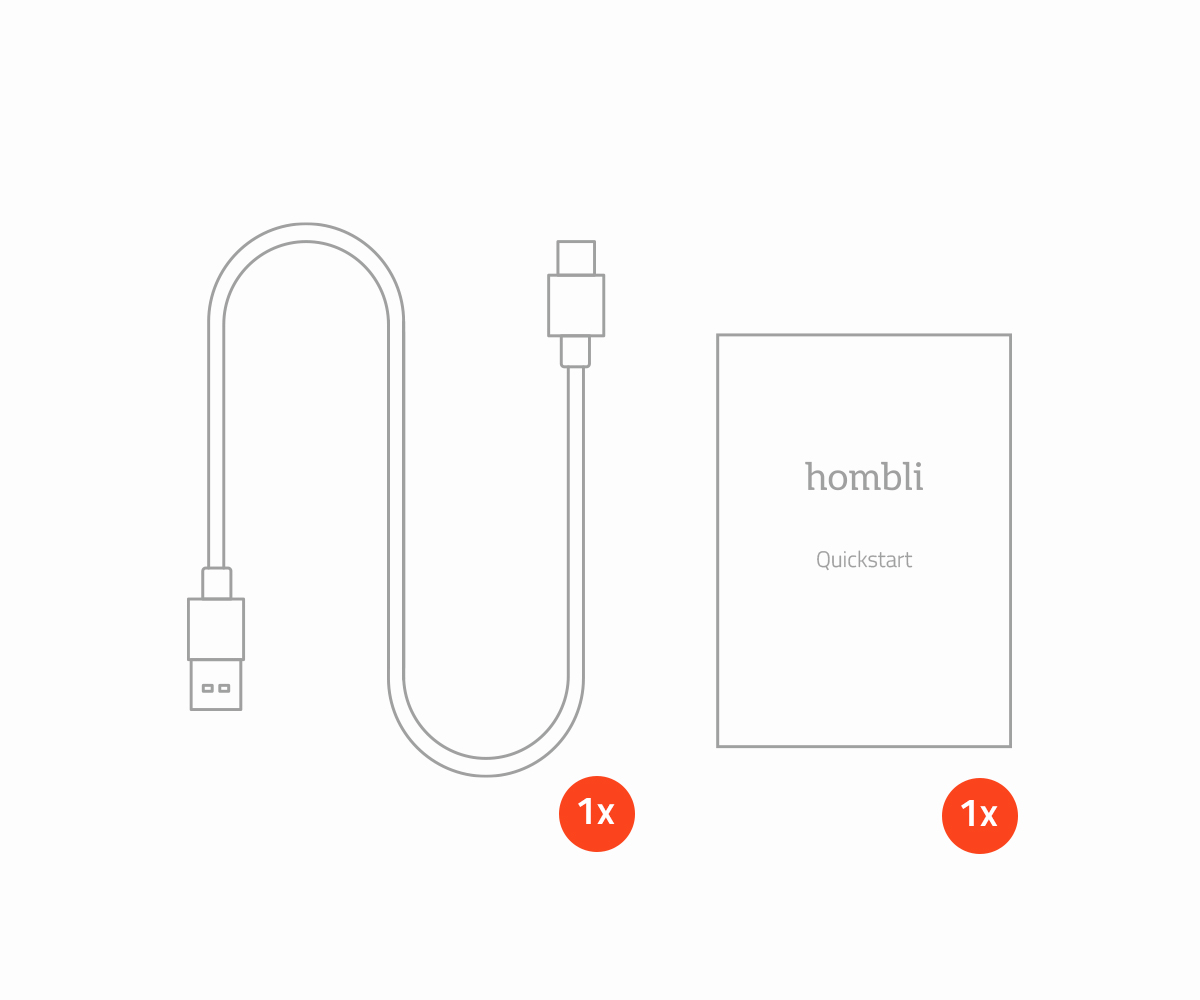
What's in the box?
- 1x Hombli Smart Doorbell
- 1x Bracket
- 1x Double-sided 3M tape
- 1x Security screw
- 1x Hex key
- 2x Wall plug & screw
- 1x Charging cable
- 1x Quickstart guide
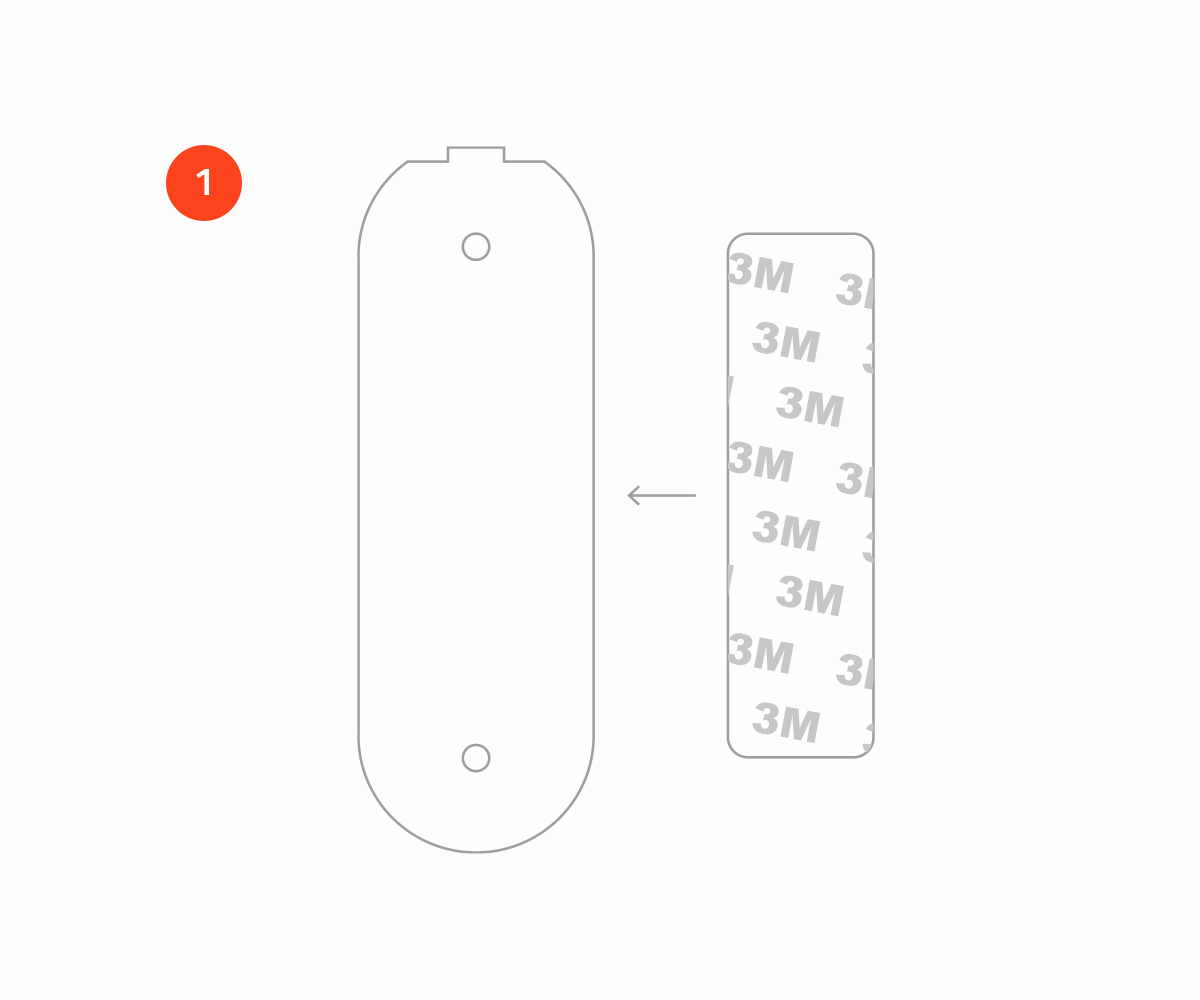


Option 1: How to Install the Doorbell With Double-Sided Tape
- Stick the double-sided 3M tape to the back of the bracket.
- Stick the bracket to the designated surface.
- Place the doorbell on the bracket.
- Secure the doorbell to the bracket by using the security screw and Hex key.

Option 2: How to Install the Doorbell With Wall Plugs and Screws
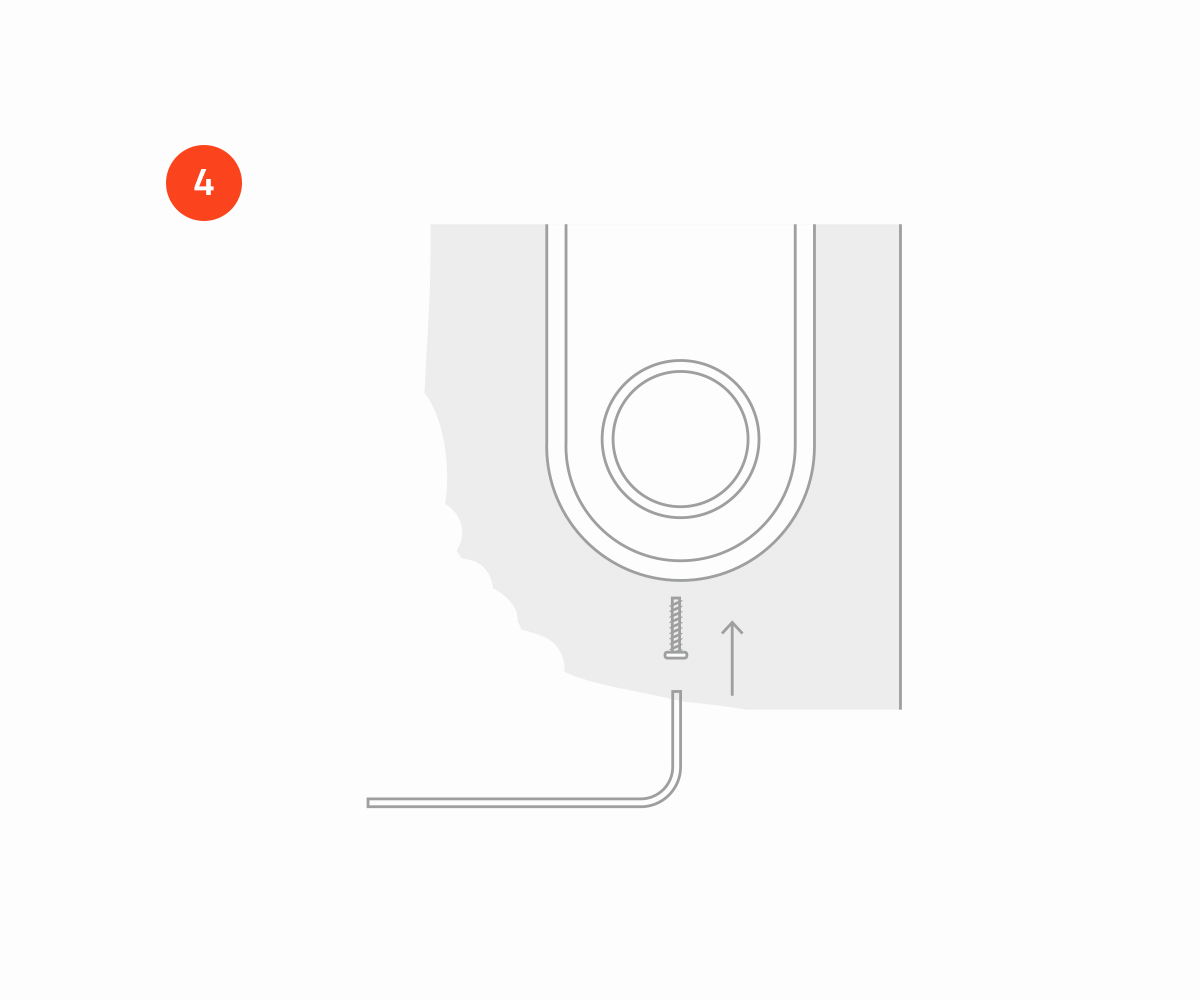
- Use the bracket to mark the location of the two holes that need to be drilled.
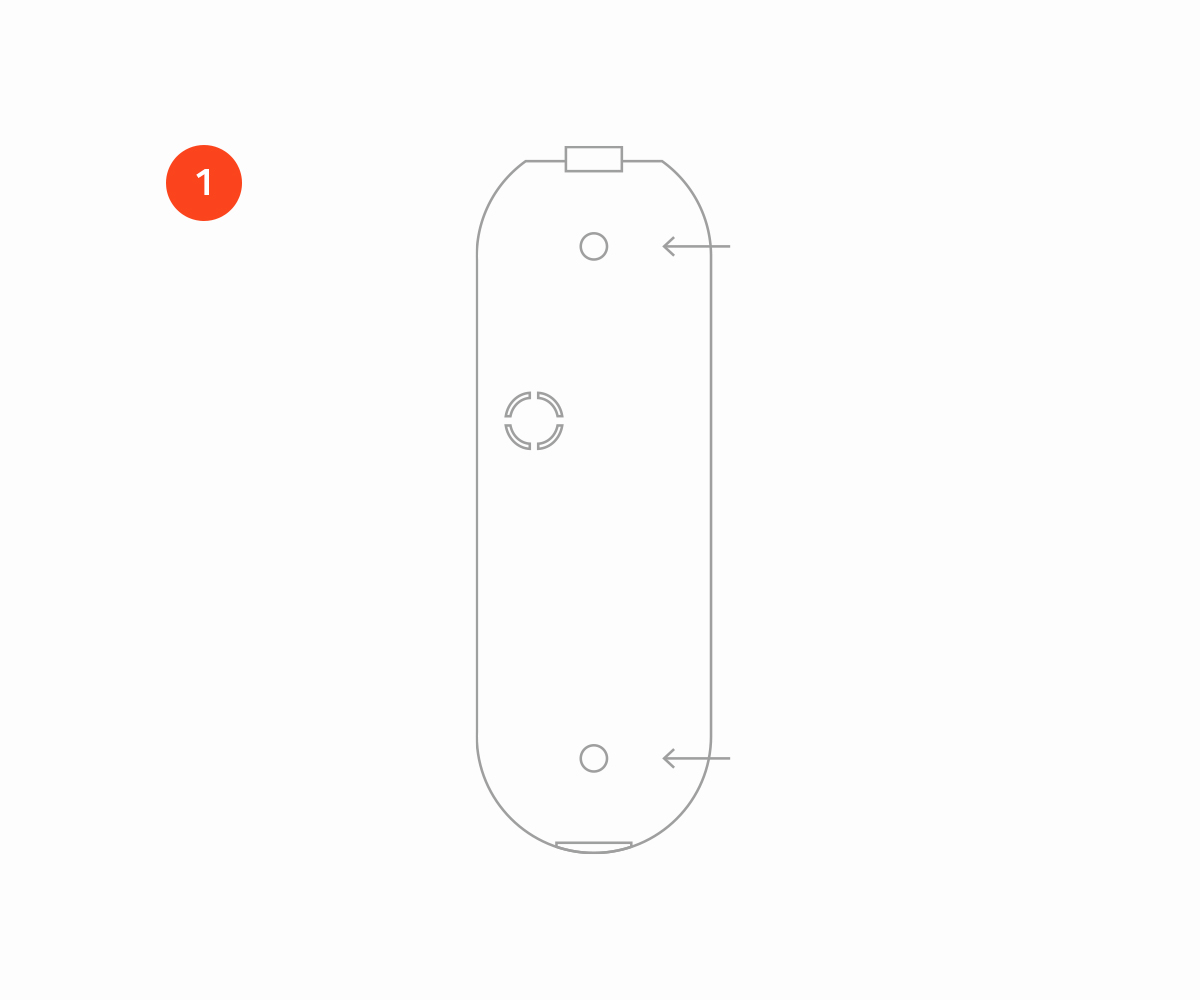
- Drill two holes. Insert the included wall plugs into the holes. Note: Skip this step if installing on a wood surface.
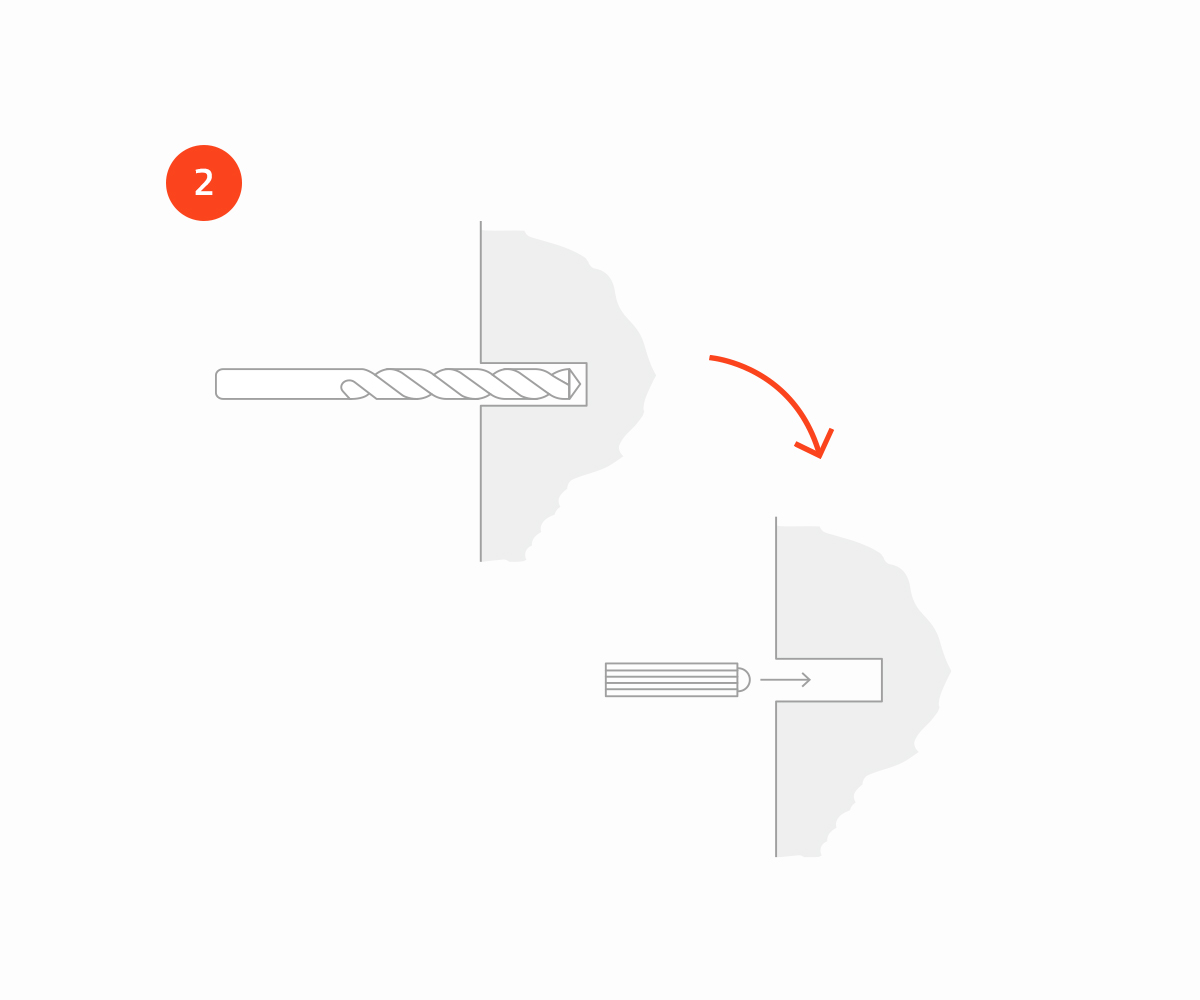
- Now use the two included screws to secure the bracket in place.
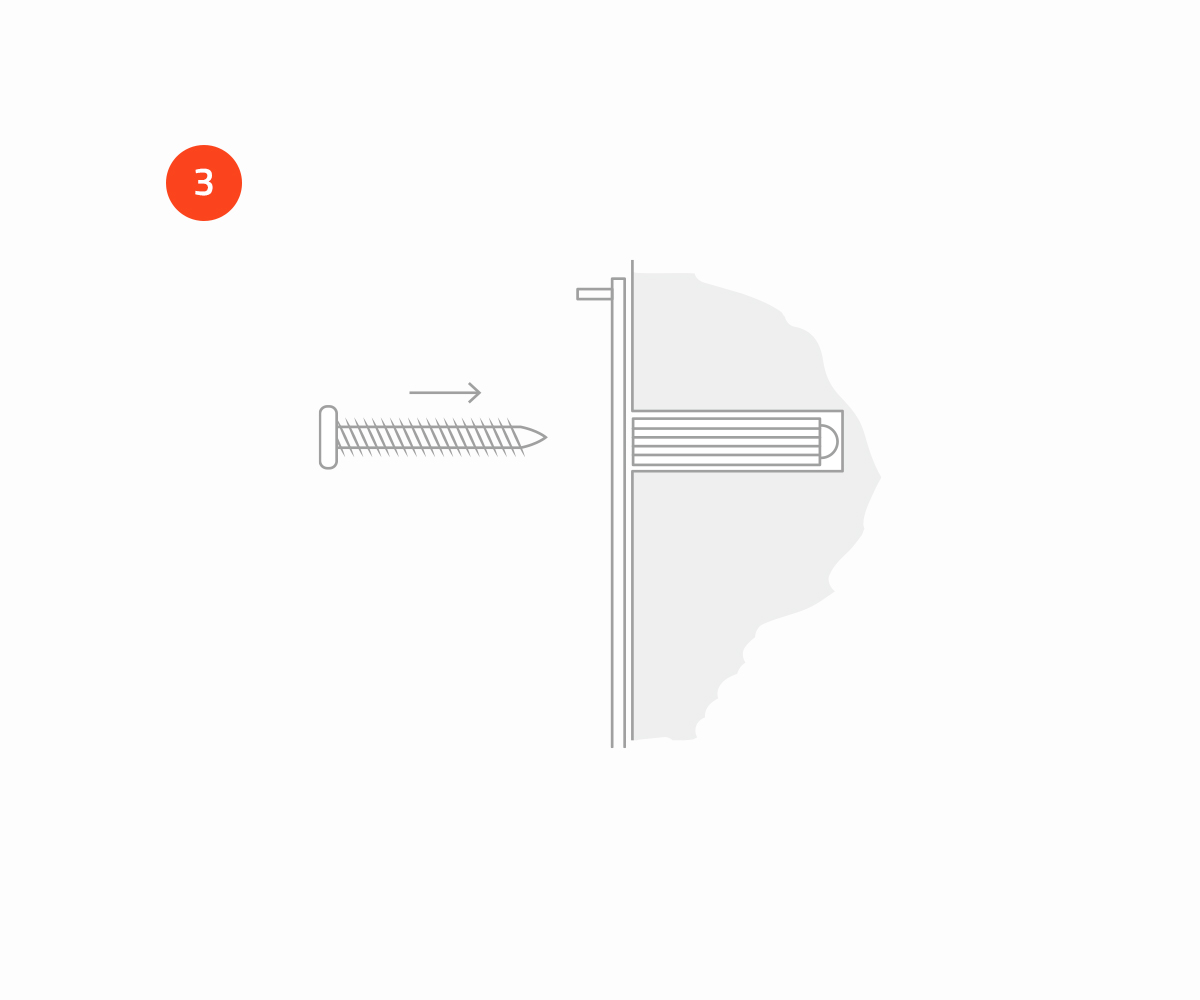
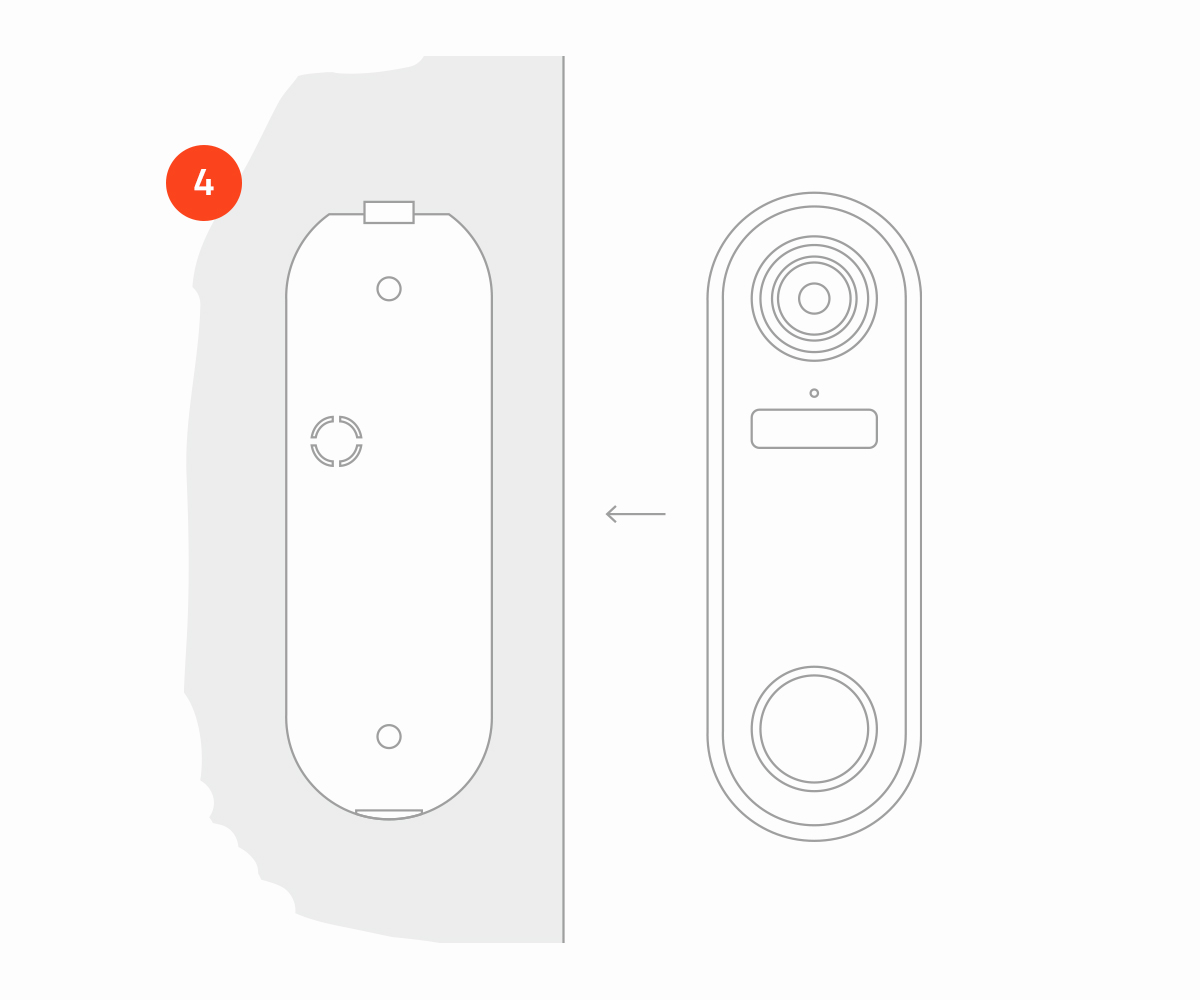
- Place the doorbell on the bracket.
- Secure the doorbell to the bracket using the security screw and Hex key.