


Smart Switch Module
What kind of Wall switches are compatible with a Hombli Smart Switch Module?
The Smart Swich Module is compatible with different kinds of wall switches such as:
- (duo) On-off switch
- Pull switch
- (duo) Pressure switch
Go to the device settings to change the type of switch.
The Switch module is not compatible with switches such as:
- Switches for window blinds, shutters, garage doors, etc.
- Selector switch
- Fan switch
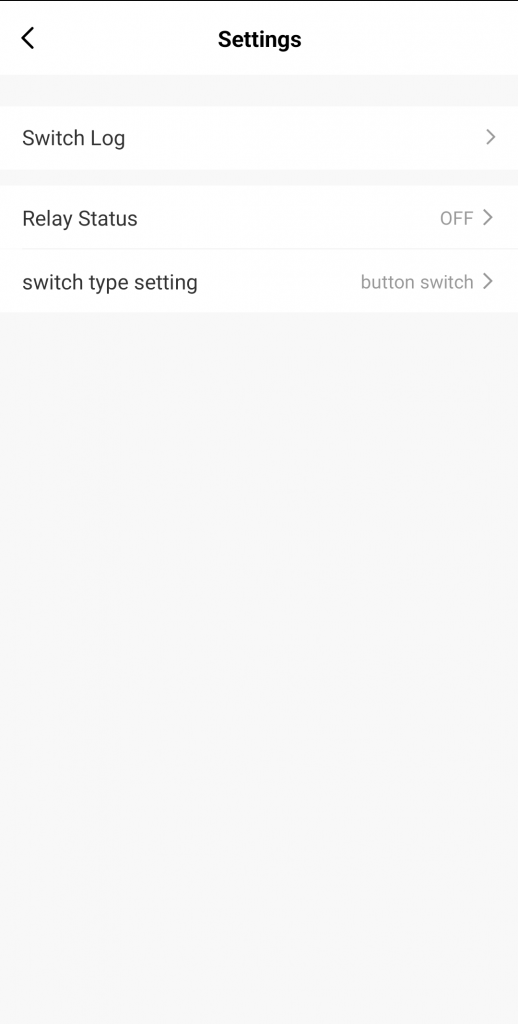
Change the type of connected wall switch under device settings in the app
Is the Smart Switch Module suitable for outside or humid spaces?
No, the Smart Switch Module is not waterproof. Make sure that the module is always protected against moisture.
How to reset a Smart Switch Module?
To reset the Smart Switch Module, you can use the reset button. You can find the location of the reset button in the image below. Use the end of a paperclip, or a similar object, to gently press the button until you hear a click.
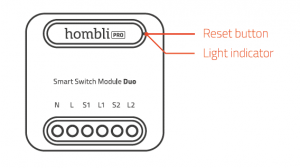
Hold it for 5 seconds, after which the blue light indicator will blink rapidly. Now the Smart Switch Module is in pairing mode, and you can connect the device again using the Hombli app. If you need more information on how to connect the Smart Switch Module, check the included quick start guide.
Another option is to use the switch that is connected to the Smart Switch Module and turn it off and on five times in quick succession. Now the module is in pairing mode, and you can connect the device again using the Hombli app.
The final option is to turn the switch in the fuse box and turn it off and on five times in quick succession. Now the module is in pairing mode, and you can connect the device again using the Hombli app.
How many devices can be connected to one Smart Switch Module?
The number of devices is different for how much Watt the device uses. The maximum load of the Smart Switch Module is 1150 Watt for normal devices or 150 Watt for LED lights.
Can I use the Smart Switch Module without the Hombli app?
Yes, when you connect to existing wall switches, you can still use these to control the lights. Check the installation scheme for a correct way to connect the module or ask a qualified electrician for advice.
Which cables do I need for the Smart Switch Module?
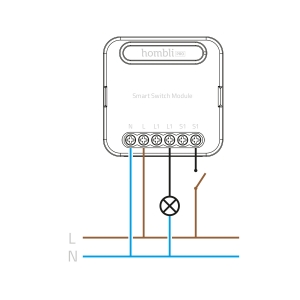
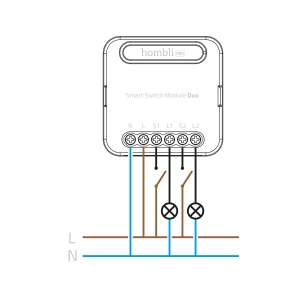
The wiring in wall switches can differ per situation, please check before ordering if your switch or junction box includes all the wires in the wiring scheme of the Smart Switch Module: blue(neutral), brown(live), and black(signal).
The required voltage of the Smart Switch Module is 100-240 Volt
How to install the Smart Switch Module behind existing wall switches?
The Hombli Smart Switch Module has a compact design, which makes it possible to install behind most traditional wall rocker or button switches and sockets. Keep in mind that the junction box needs a neutral and live wire besides the signal/switch wire, because the Switch Module always needs electricity to operate.
Wiring Instructions
- Turn off the power before carrying out any installation work.
- Connect wires according to the wiring diagram.
- Insert the module into the junction box.
- Connect the power supply and follow configuration instructions.
Notes: Take your smartphone close to the switch module when you’re configuring, and make sure you have strong Wi-Fi signal.
Warnings
- Installation should be carried out by a qualified electrician in accordance with local regulations.
- Keep the device away from water, damp or hot environments.
- Do NOT attempt to disassemble, repair or modify the device.
How can I automate the Smart Switch Module?
There are two methods to automate a Hombli Smart Switch Module:
- With a Schedule
Great if you want to turn the Switch Module on or off at specific times. - With an Automatic Scenario
Ideal if you want to automate multiple smart home devices or automate devices based on advanced triggers, such as weather or whether you are home or not.
1. Schedule
There are 5 different types of schedules:
- Timer
Manually set a timer to turn the Smart Switch Module on or off based on the current state of the switch. - Planning
Automatically turn the Smart Switch Module on or off at a specific time for certain days. - Cycle
Automatically turn the Smart Switch Module on at a specific time and turn it off automatically. - Random
Randomly turn Smart Switch Module on and off automatically to mimic that you are at home. - Auto-off
When the Smart Switch Module is turned on, it will turn off automatically after the specified time.
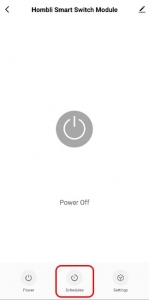
Select the switch for which you want to set a timer Choose “Schedules”.
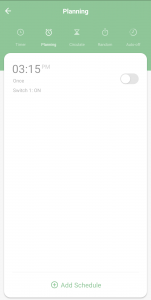
Select the type of Schedule and click on ‘add schedule’
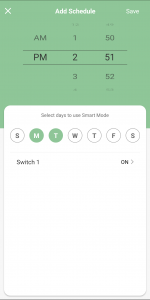
Choose the time and day(s) when the switch should turn on or off and click on save to activate the schedule
Automatic Scenario
With an automatic scenario, actions can be automatically executed when certain conditions are met. Conditions can be:
- A camera that detects movement.
- A heat sensor that measures a certain temperature.
- Certain weather conditions.
- Sunrise or sunset.
Follow these steps to set up an automatic scenario:
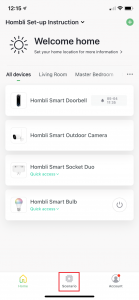
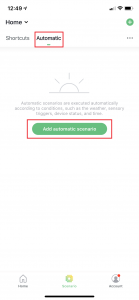
- Go to the main screen of the Hombli app and tap “Scenario” at the bottom.
- Choose “Automatic” and tap “Add automatic scenario”.
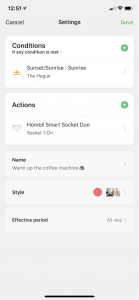
Here you can specify the conditions for the scenario. You can set up an automatic scenario in 3 steps:
- Choose the conditions for when the action should be performed.
- Choose which actions must be executed.
- Name your automatic scenario and personalize it with a color and an image.
I am unable to establish a connection between my network and the Hombli Smart Switch Module
There are two methods to make a connection between a Hombli Smart Switch Module and your home network:
- Manual
- Auto Scan
Manual
- Connect your phone to your 2.4GHz Wi-Fi network. Please note that 5GHz Wi-Fi networks are not supported.
- Tap in the Hombli app on the green plus symbol to add a device.
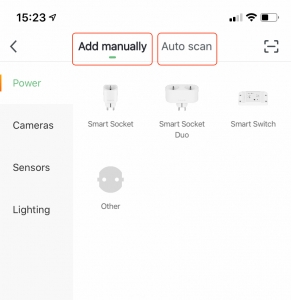
- Choose at the top of the screen for “Add Manually”. This option is selected by default.
- Choose the switch module in the “Power” category.
- Tap on continue when the Hombli Smart Switch Module repeatedly flashes as shown on the screen.
- If the Hombli Smart Switch Module does not flash as shown on the screen, tap “help” for instructions to reset the switch.
Auto Scan
- Connect your phone to your 2.4GHz Wi-Fi network. Please note that 5GHz Wi-Fi networks are not supported.
- Turn on your Bluetooth
- Turn on the location services of your phone and give the Hombli app access to your location.
- Tap the green plus symbol in the Hombli app to add a device.
- Select the top of the screen for an auto scan. The Hombli app will search all available devices and add them.
Didn’t find an answer here? Please contact Customer Support