


 100- 240V / up to 2300W
  Control via your smartphone
 Install behind existing wall switches
 Overload protection
 Set timers and schedules
 No hub required
 Voice control via Google Assistant, Alexa and Siri
Discover all features
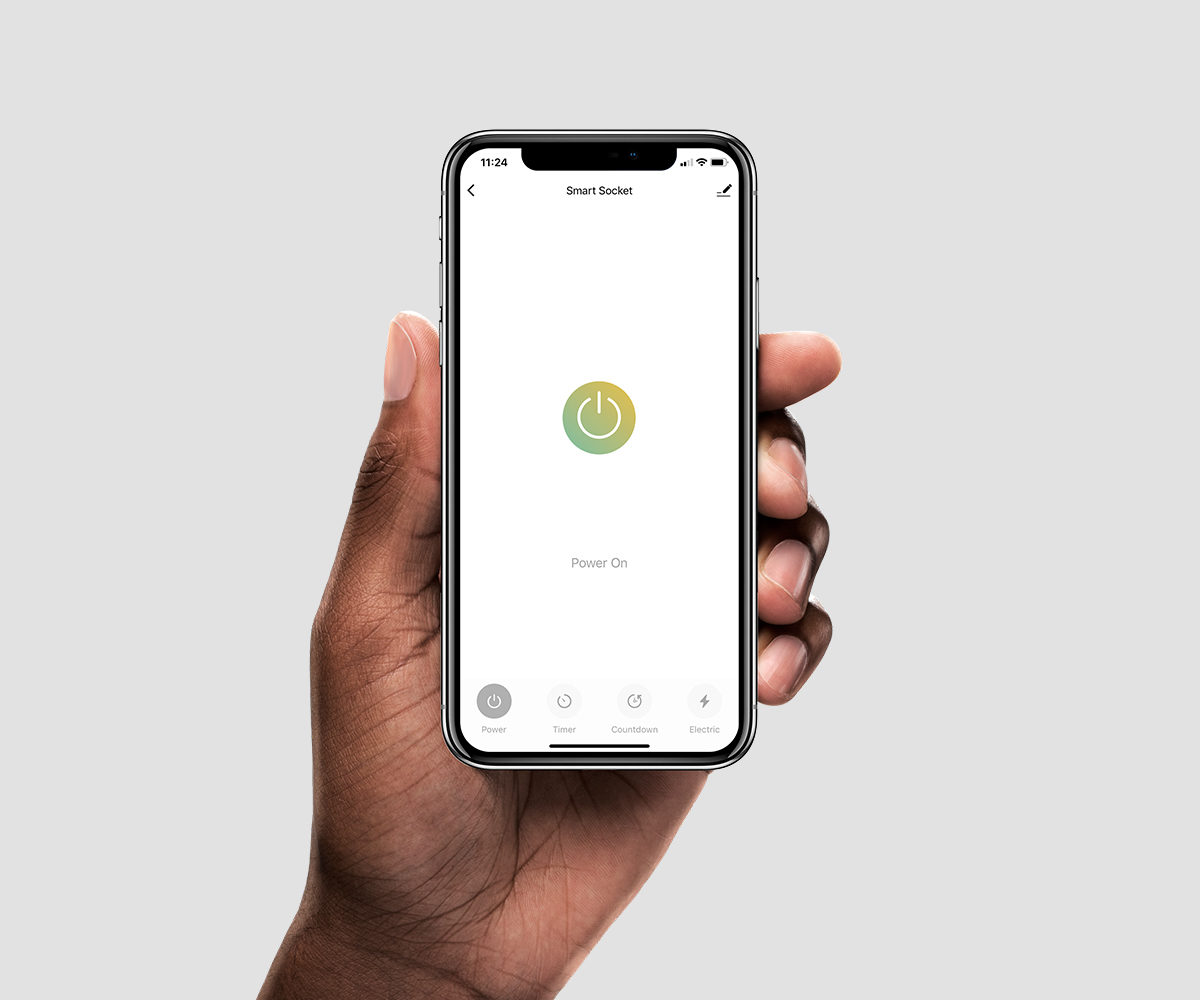
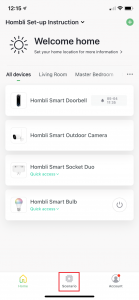
Full Control With Your Smartphone
Remotely check if home appliances are left on by accident and turn them off from anywhere using the free Hombli app. Leave your home worry-free!
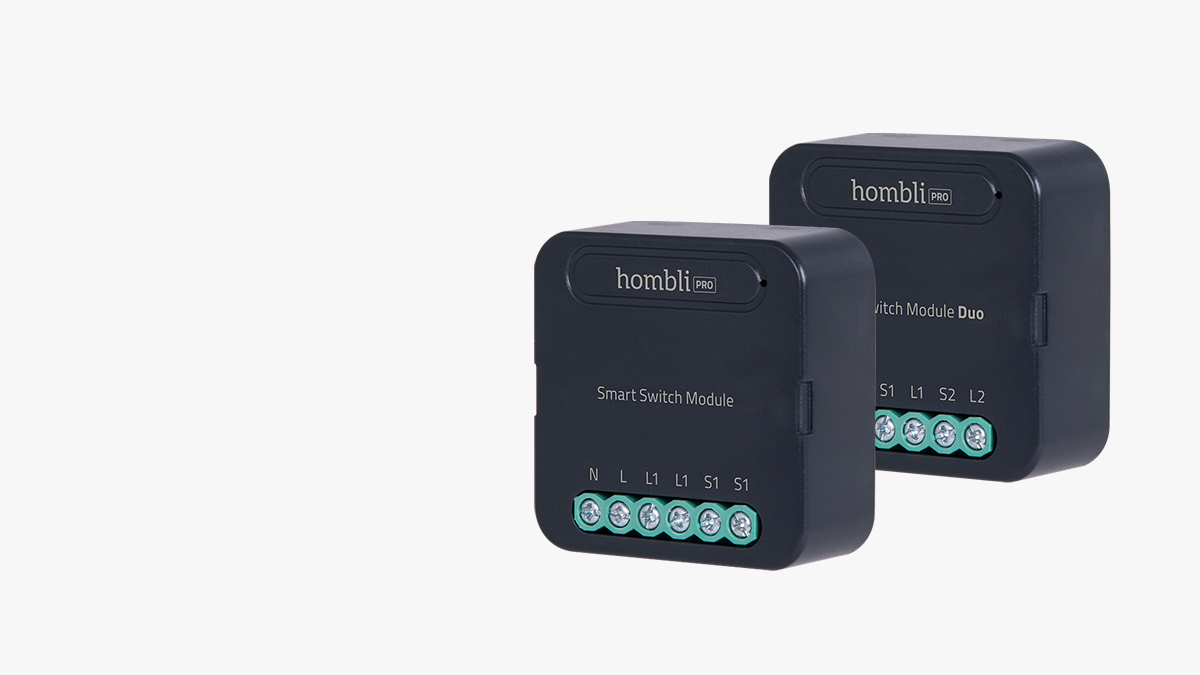
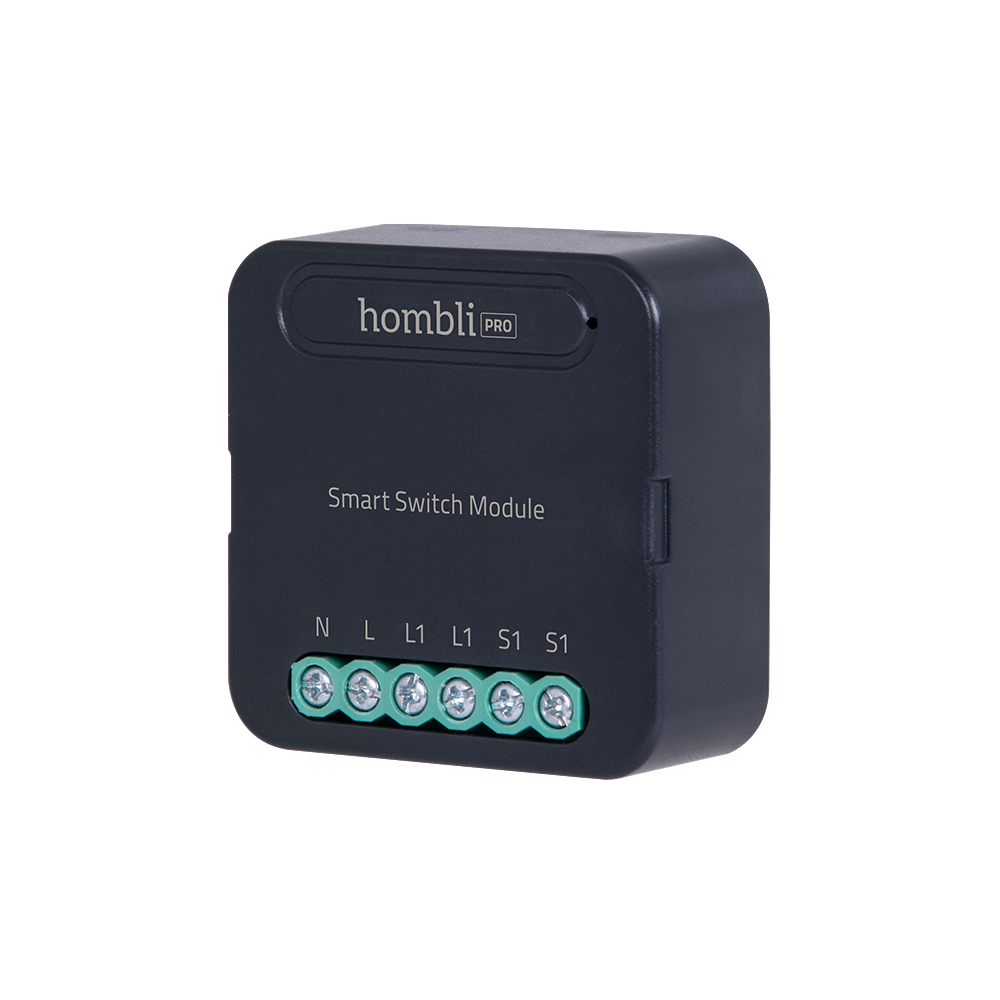
Install behind existing wall switches
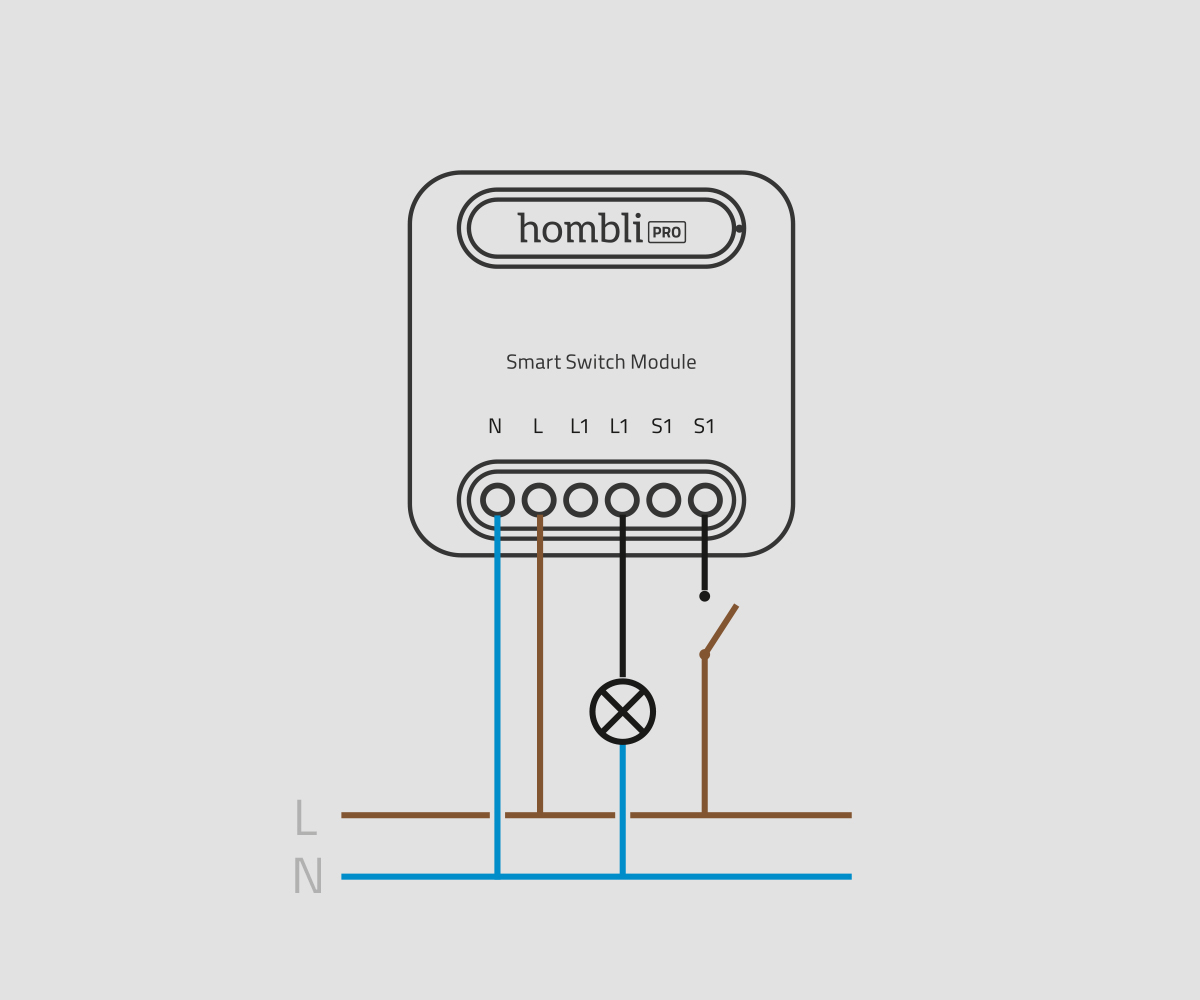
The Hombli Smart Switch Module has a compact design, which makes it possible to install behind most traditional wall rocker or button switches and sockets. Keep in mind that the junction box needs a neutral and live wire besides the signal/switch wire because the Switch Module always needs electricity to operate.

Control your device from anywhere
You easily control your Hombli device using the Hombli app on your smartphone. Wherever you are and whenever you want.
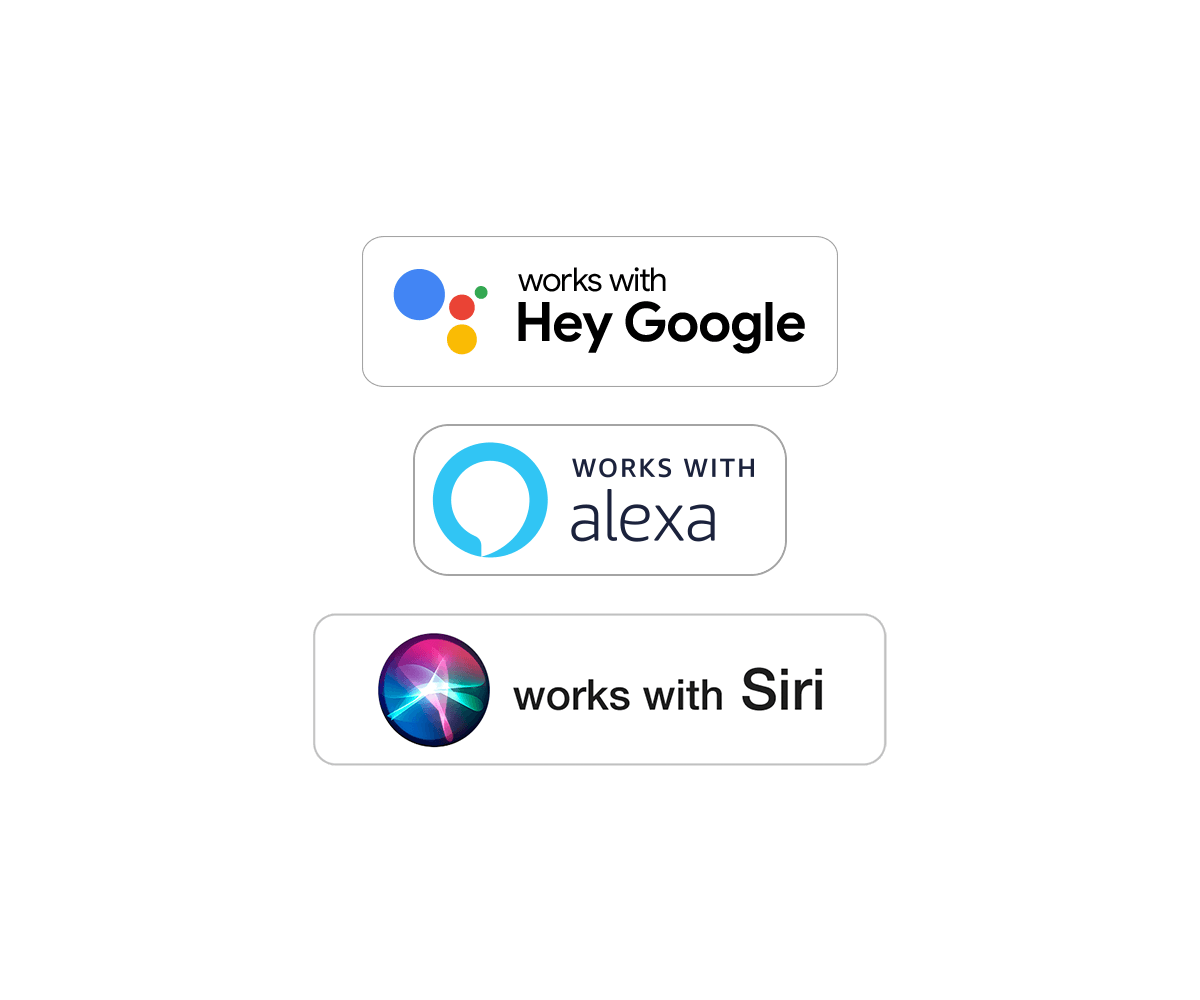
Voice control with Google, Alexa, and Siri
This smart socket works seamlessly together with Amazon Alexa, Google Assistant, and Siri Shortcuts for hands-free voice control. Use your voice to pre-heat your espresso maker and immediately enjoy a nice cup of coffee to start the day.

Requires basic technical skills
To install the Smart Switch you’ll need basic electrical wiring knowledge and tools like a screwdriver, wire stripper, and voltage checker.
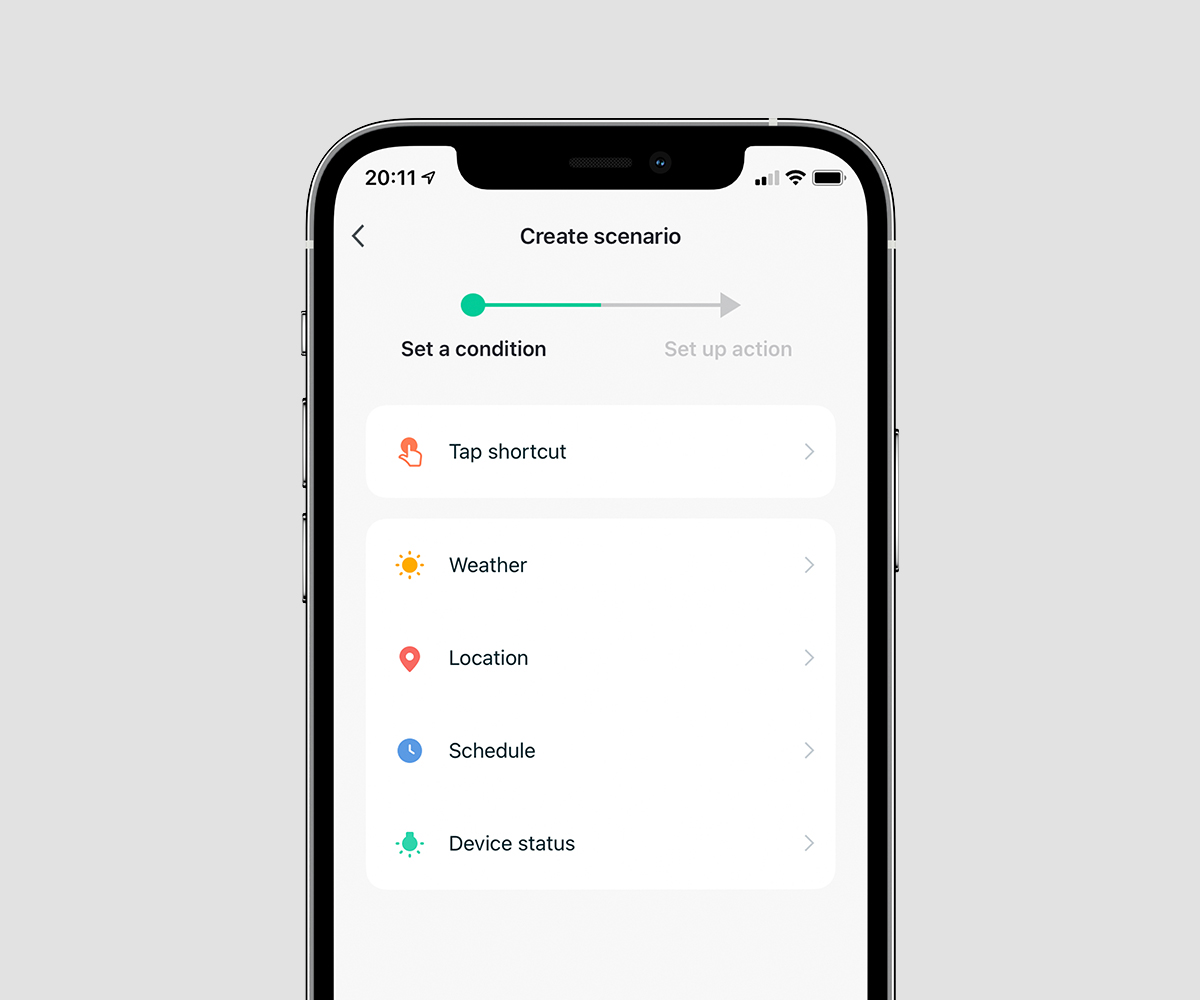
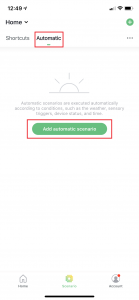
Create your favorite scenarios
A smart scenario is a special script for your devices. Written by you, easily created in the Hombli app. Automate your Hombli device to be active as soon as it’s dark outside. Or let it automatically turn off during specific hours. The possibilities are endless. Read here how it works.
Your privacy is our top priority
We highly respect your privacy and do everything in our power to protect it. Our Cloud servers are secured by Amazon and located in Frankfurt, Germany, where privacy standards are very high. Your data will always be stored, used, and deleted in accordance with the GDPR directive and is available for your eyes only.
FAQs
How can I automate the Hombli Smart Switch?
- With a Timer
- With a Schedule
- With an Automatic Scenario
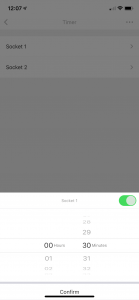
- Choose "Timer".
- Select the socket for which you want to set a timer.
- Set when the timer should end and tap "Confirm".
- Choose "Schedule".
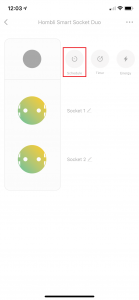
- Tap “Add” to add a schedule.
- On this screen, you can choose at what time the action should take place, what the action is, and how often it should be repeated.
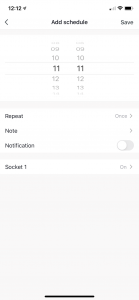
- Choose if you want to receive a notification when the task is completed.
- After entering all the settings, press “Save” to save the schedule.
- A camera that detects movement.
- A heat sensor that measures a certain temperature.
- Certain weather conditions
- Sunrise or sunset
- Go to the main screen of the Hombli app and tap “Scenario” at the bottom.
- Choose “Automatic” and tap “Add automatic scenario”.
- Here you can specify the conditions for the scenario. You can set up an automatic scenario in 3 steps.
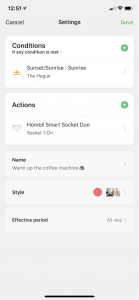
- Choose the conditions for when the action should be performed.
- Choose which actions must be executed.
- Name your automatic scenario and personalize it with a color and an image.
How do I connect a Hombli device to my dual-band router?
1. Splitting the frequencies in your router.
By giving the wifi networks your router creates different names, e.g.: "Home wifi 2.4GHz", and "Home wifi 5GHz" This can likely be set up in your router, although this is not the case for all routers. Check your router settings, or the manual for the router if this is an option for you.
2. Disabling 5GHz in your router settings.
If there is no 5GHz network, your phone cannot connect to it.
3. Disabling connections to 5GHz in your phone settings.
Some phones have the option to only connect to 2.4GHz networks. That way you are also sure to connect to the right type of network for Hombli devices. After pairing your Hombli device, you can turn this option off again in your phone, so your phone can connect to 5GHz networks again. Check your phone settings, or the manual for your phone if this is an option for you.
4. Connecting to your router on your phone, while being further away from your router
This might sound like a bit of Dark Magic, but it might be the simplest option, no changing of any options required! The difference between 2.4GHz and 5Ghz is that 5Ghz is stronger closer to the router, but 2.4GHz has a further reach. So if you stand further away from your router, your phone will be more likely to choose the 2.4Ghz network.
To summarize: please make sure your phone is connected to your router via a 2.4GHz frequency, before adding a Hombli device.
We hope this helps to explain it clearly for you, but please let us know if any questions remain!
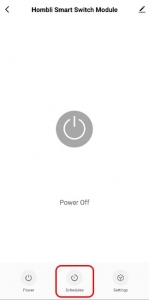
How can I automate the Smart Switch Module?
- With a Schedule Great if you want to turn the Switch Module on or off at specific times.
- With an Automatic Scenario Ideal if you want to automate multiple smart home devices or automate devices based on advanced triggers, such as weather or whether you are home or not.
1. Schedule
There are 5 different types of schedules:- Timer Manually set a timer to turn the Smart Switch Module on or off based on the current state of the switch.
- Planning Automatically turn the Smart Switch Module on or off at a specific time for certain days.
- Cycle Automatically turn the Smart Switch Module on at a specific time and turn it off automatically.
- Random Randomly turn Smart Switch Module on and off automatically to mimic that you are at home.
- Auto-off When the Smart Switch Module is turned on, it will turn off automatically after the specified time.
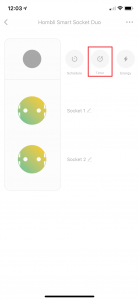
 Select the switch for which you want to set a timer Choose “Schedules”.[/caption]
[caption id="attachment_12355" align="alignnone" width="151"]
Select the switch for which you want to set a timer Choose “Schedules”.[/caption]
[caption id="attachment_12355" align="alignnone" width="151"]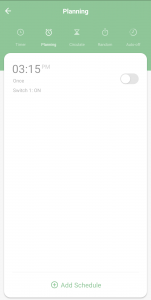 Select the type of Schedule and click on ‘add schedule’[/caption]
[caption id="attachment_12367" align="alignnone" width="150"]
Select the type of Schedule and click on ‘add schedule’[/caption]
[caption id="attachment_12367" align="alignnone" width="150"]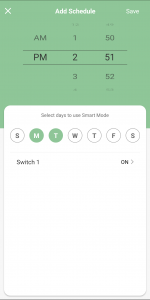 Choose the time and day(s) when the switch should turn on or off and click on save to activate the schedule[/caption]
Automatic Scenario
With an automatic scenario, actions can be automatically executed when certain conditions are met. Conditions can be:- A camera that detects movement.
- A heat sensor that measures a certain temperature.
- Certain weather conditions.
- Sunrise or sunset.
- Go to the main screen of the Hombli app and tap “Scenario” at the bottom.
- Choose “Automatic” and tap “Add automatic scenario”.
Here you can specify the conditions for the scenario. You can set up an automatic scenario in 3 steps:
- Choose the conditions for when the action should be performed.
- Choose which actions must be executed.
- Name your automatic scenario and personalize it with a color and an image.
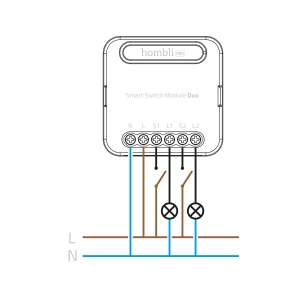
How many devices can be connected to one Smart Switch Module?
How to install the Smart Switch Module behind existing wall switches?
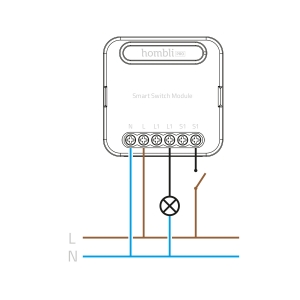
 Wiring Instructions
- Turn off the power before carrying out any installation work.
- Connect wires according to the wiring diagram.
- Insert the module into the junction box.
- Connect the power supply and follow configuration instructions.
- Installation should be carried out by a qualified electrician in accordance with local regulations.
- Keep the device away from water, damp or hot environments.
- Do NOT attempt to disassemble, repair or modify the device.
Which cables do I need for the Smart Switch Module?
What kind of Wall switches are compatible with a Hombli Smart Switch Module?
- (duo) On-off switch
- Pull switch
- (duo) Pressure switch
- Switches for window blinds, shutters, garage doors, etc.
- Selector switch
- Fan switch
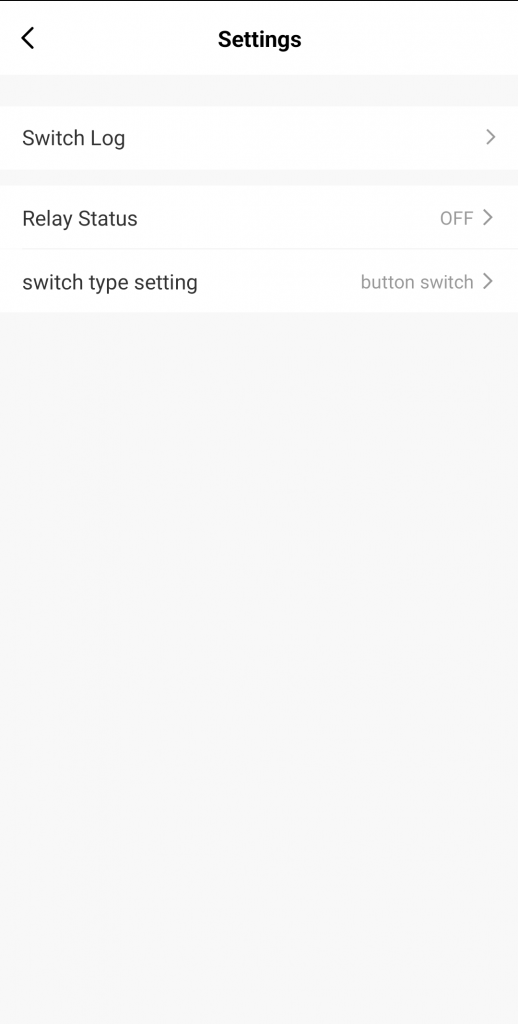 Change the type of connected wall switch under device settings in the app[/caption]